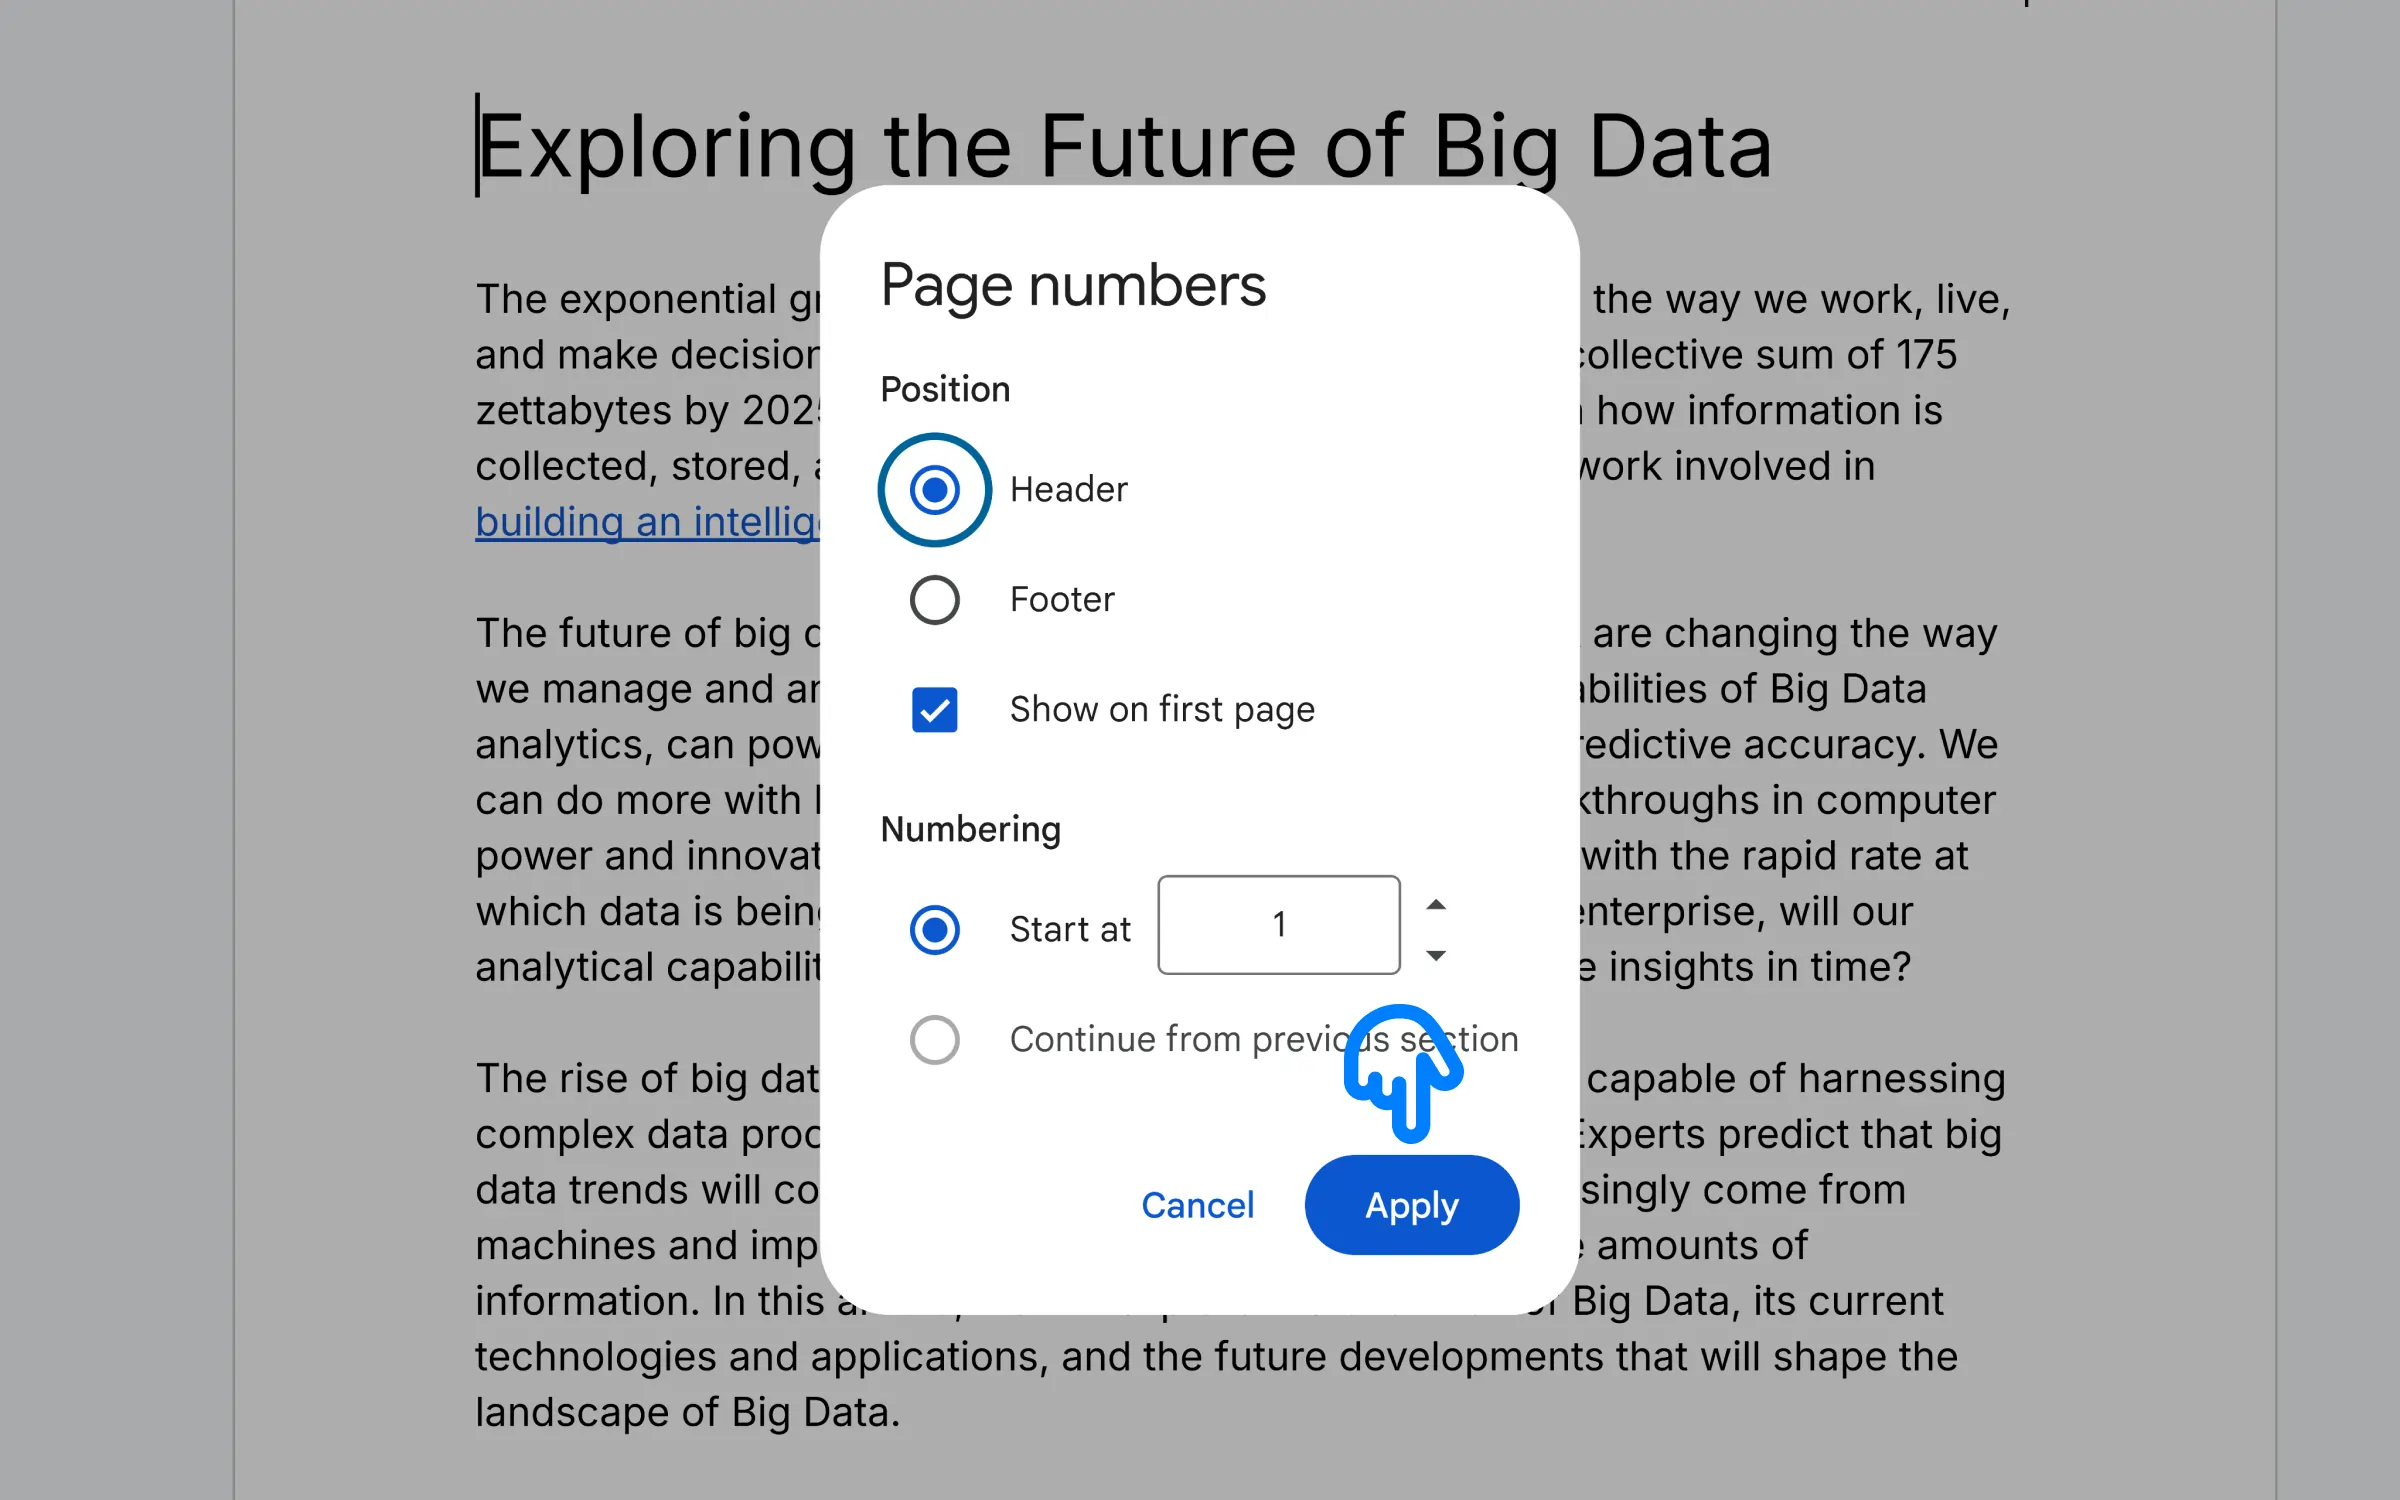
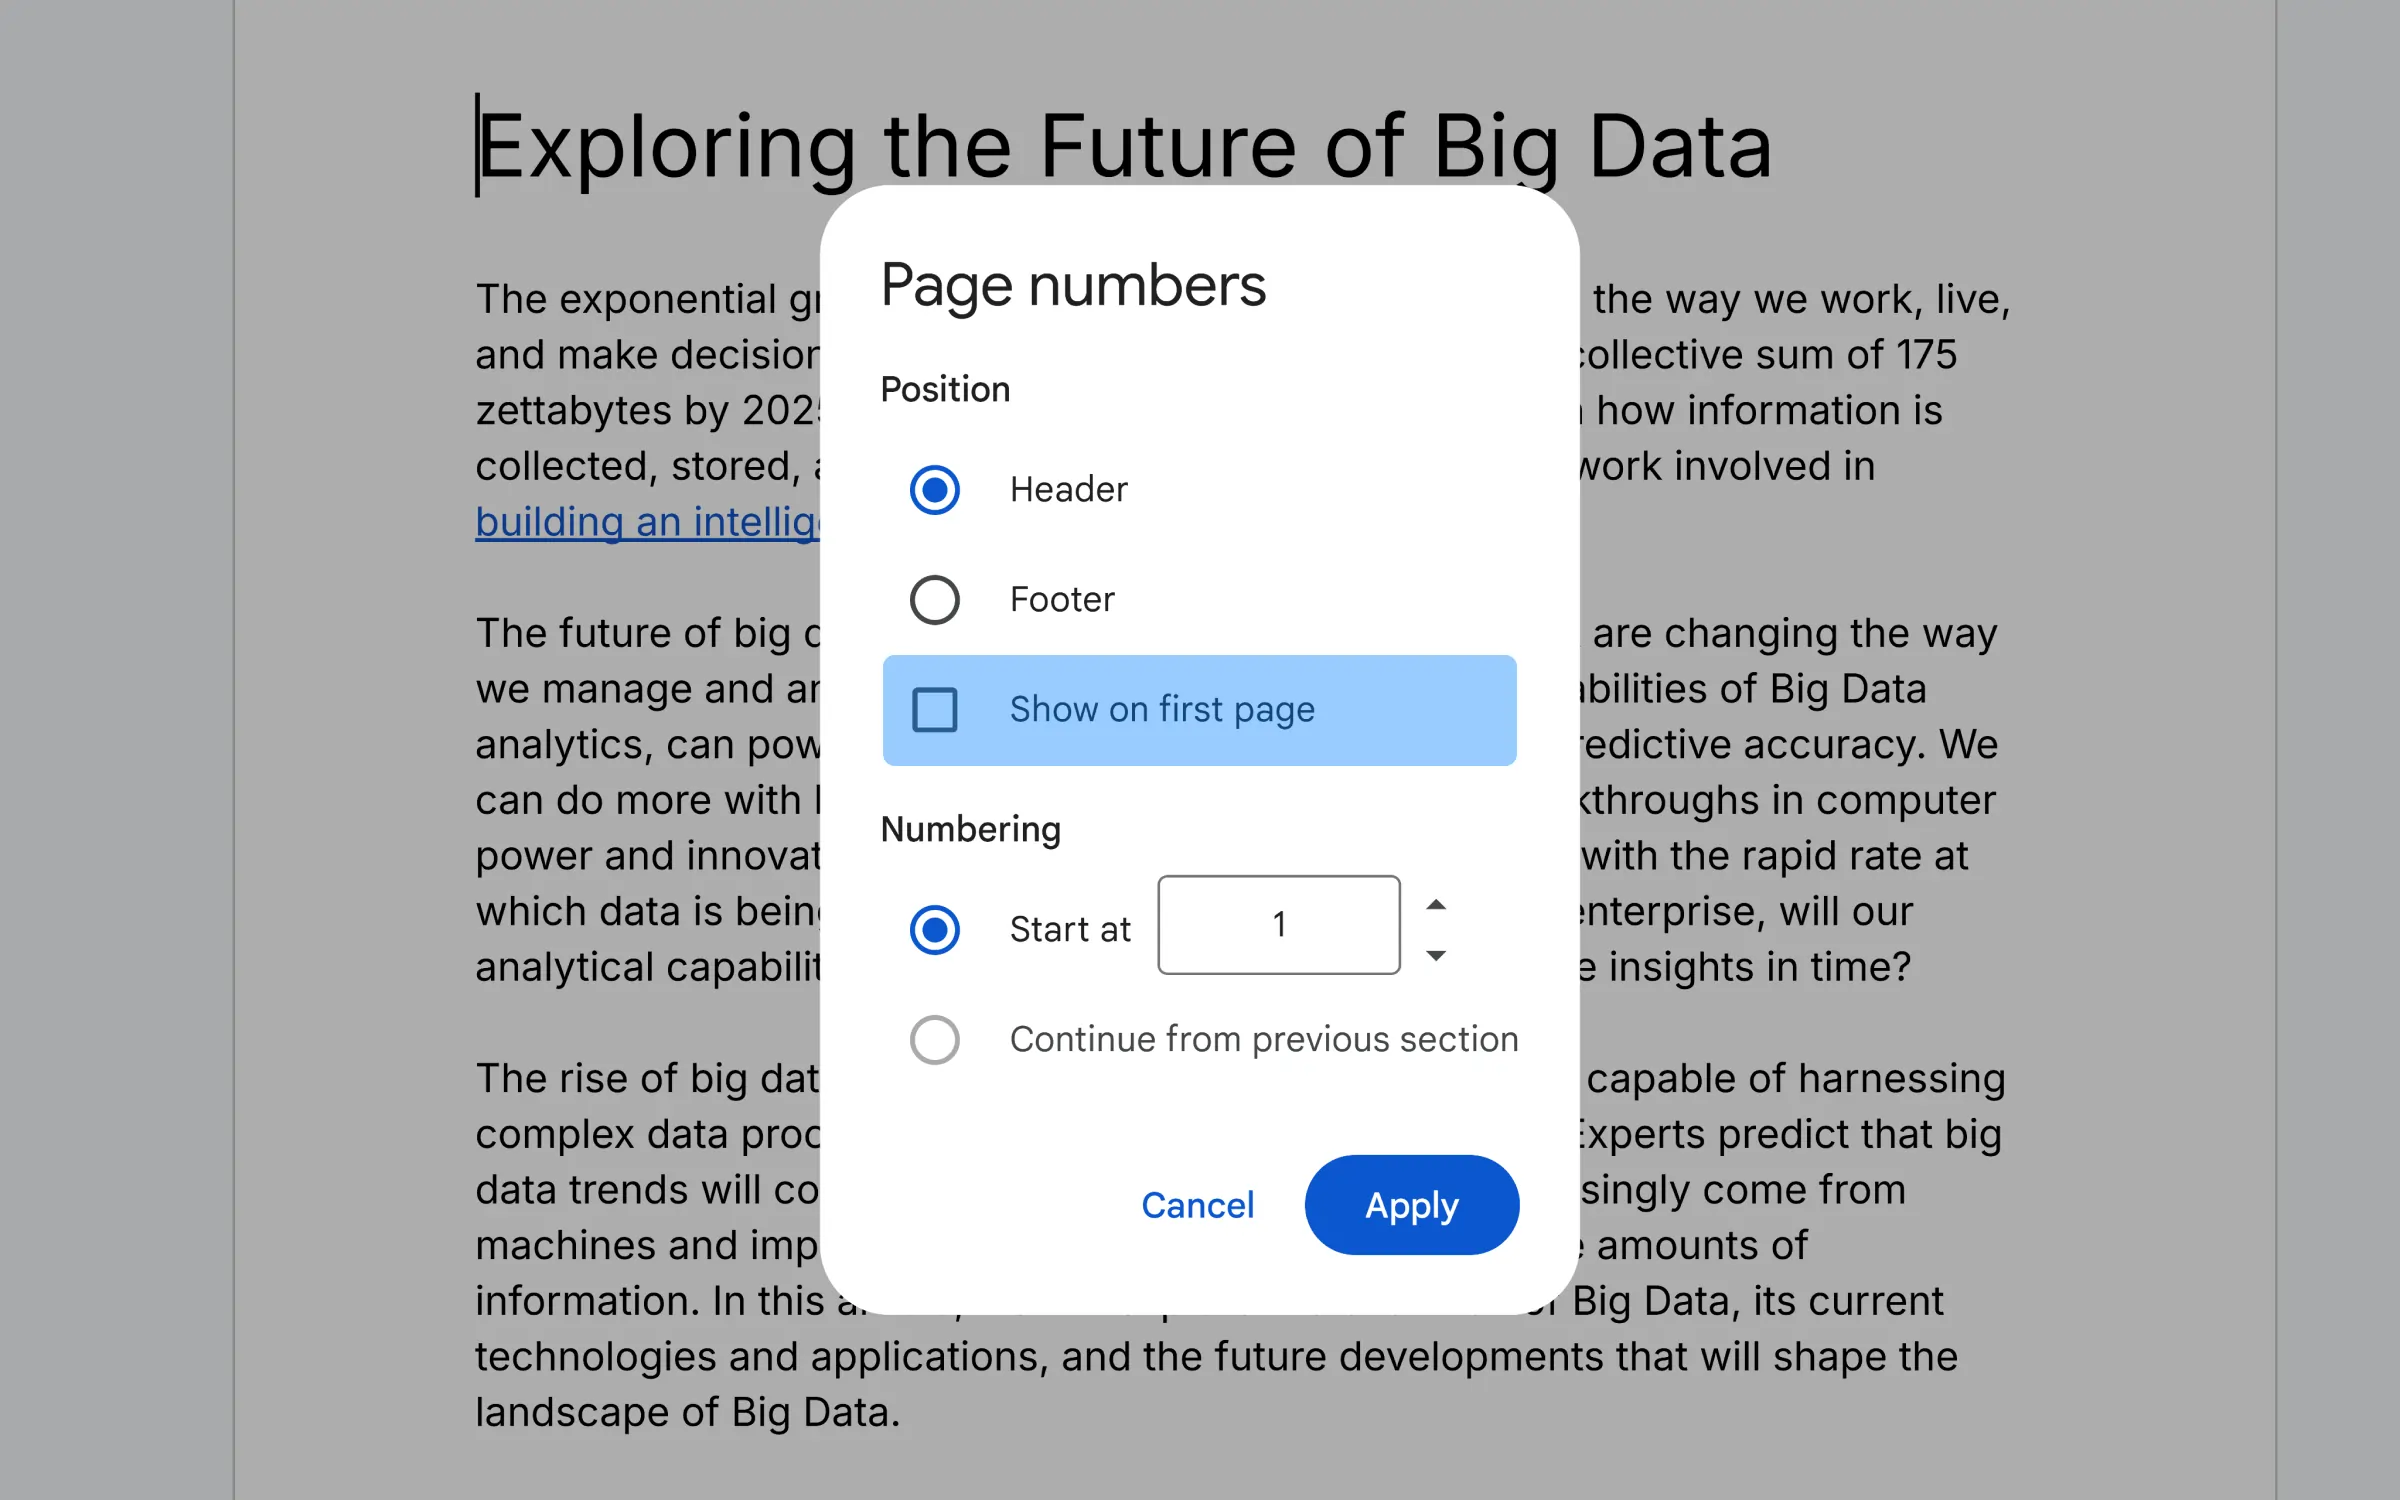
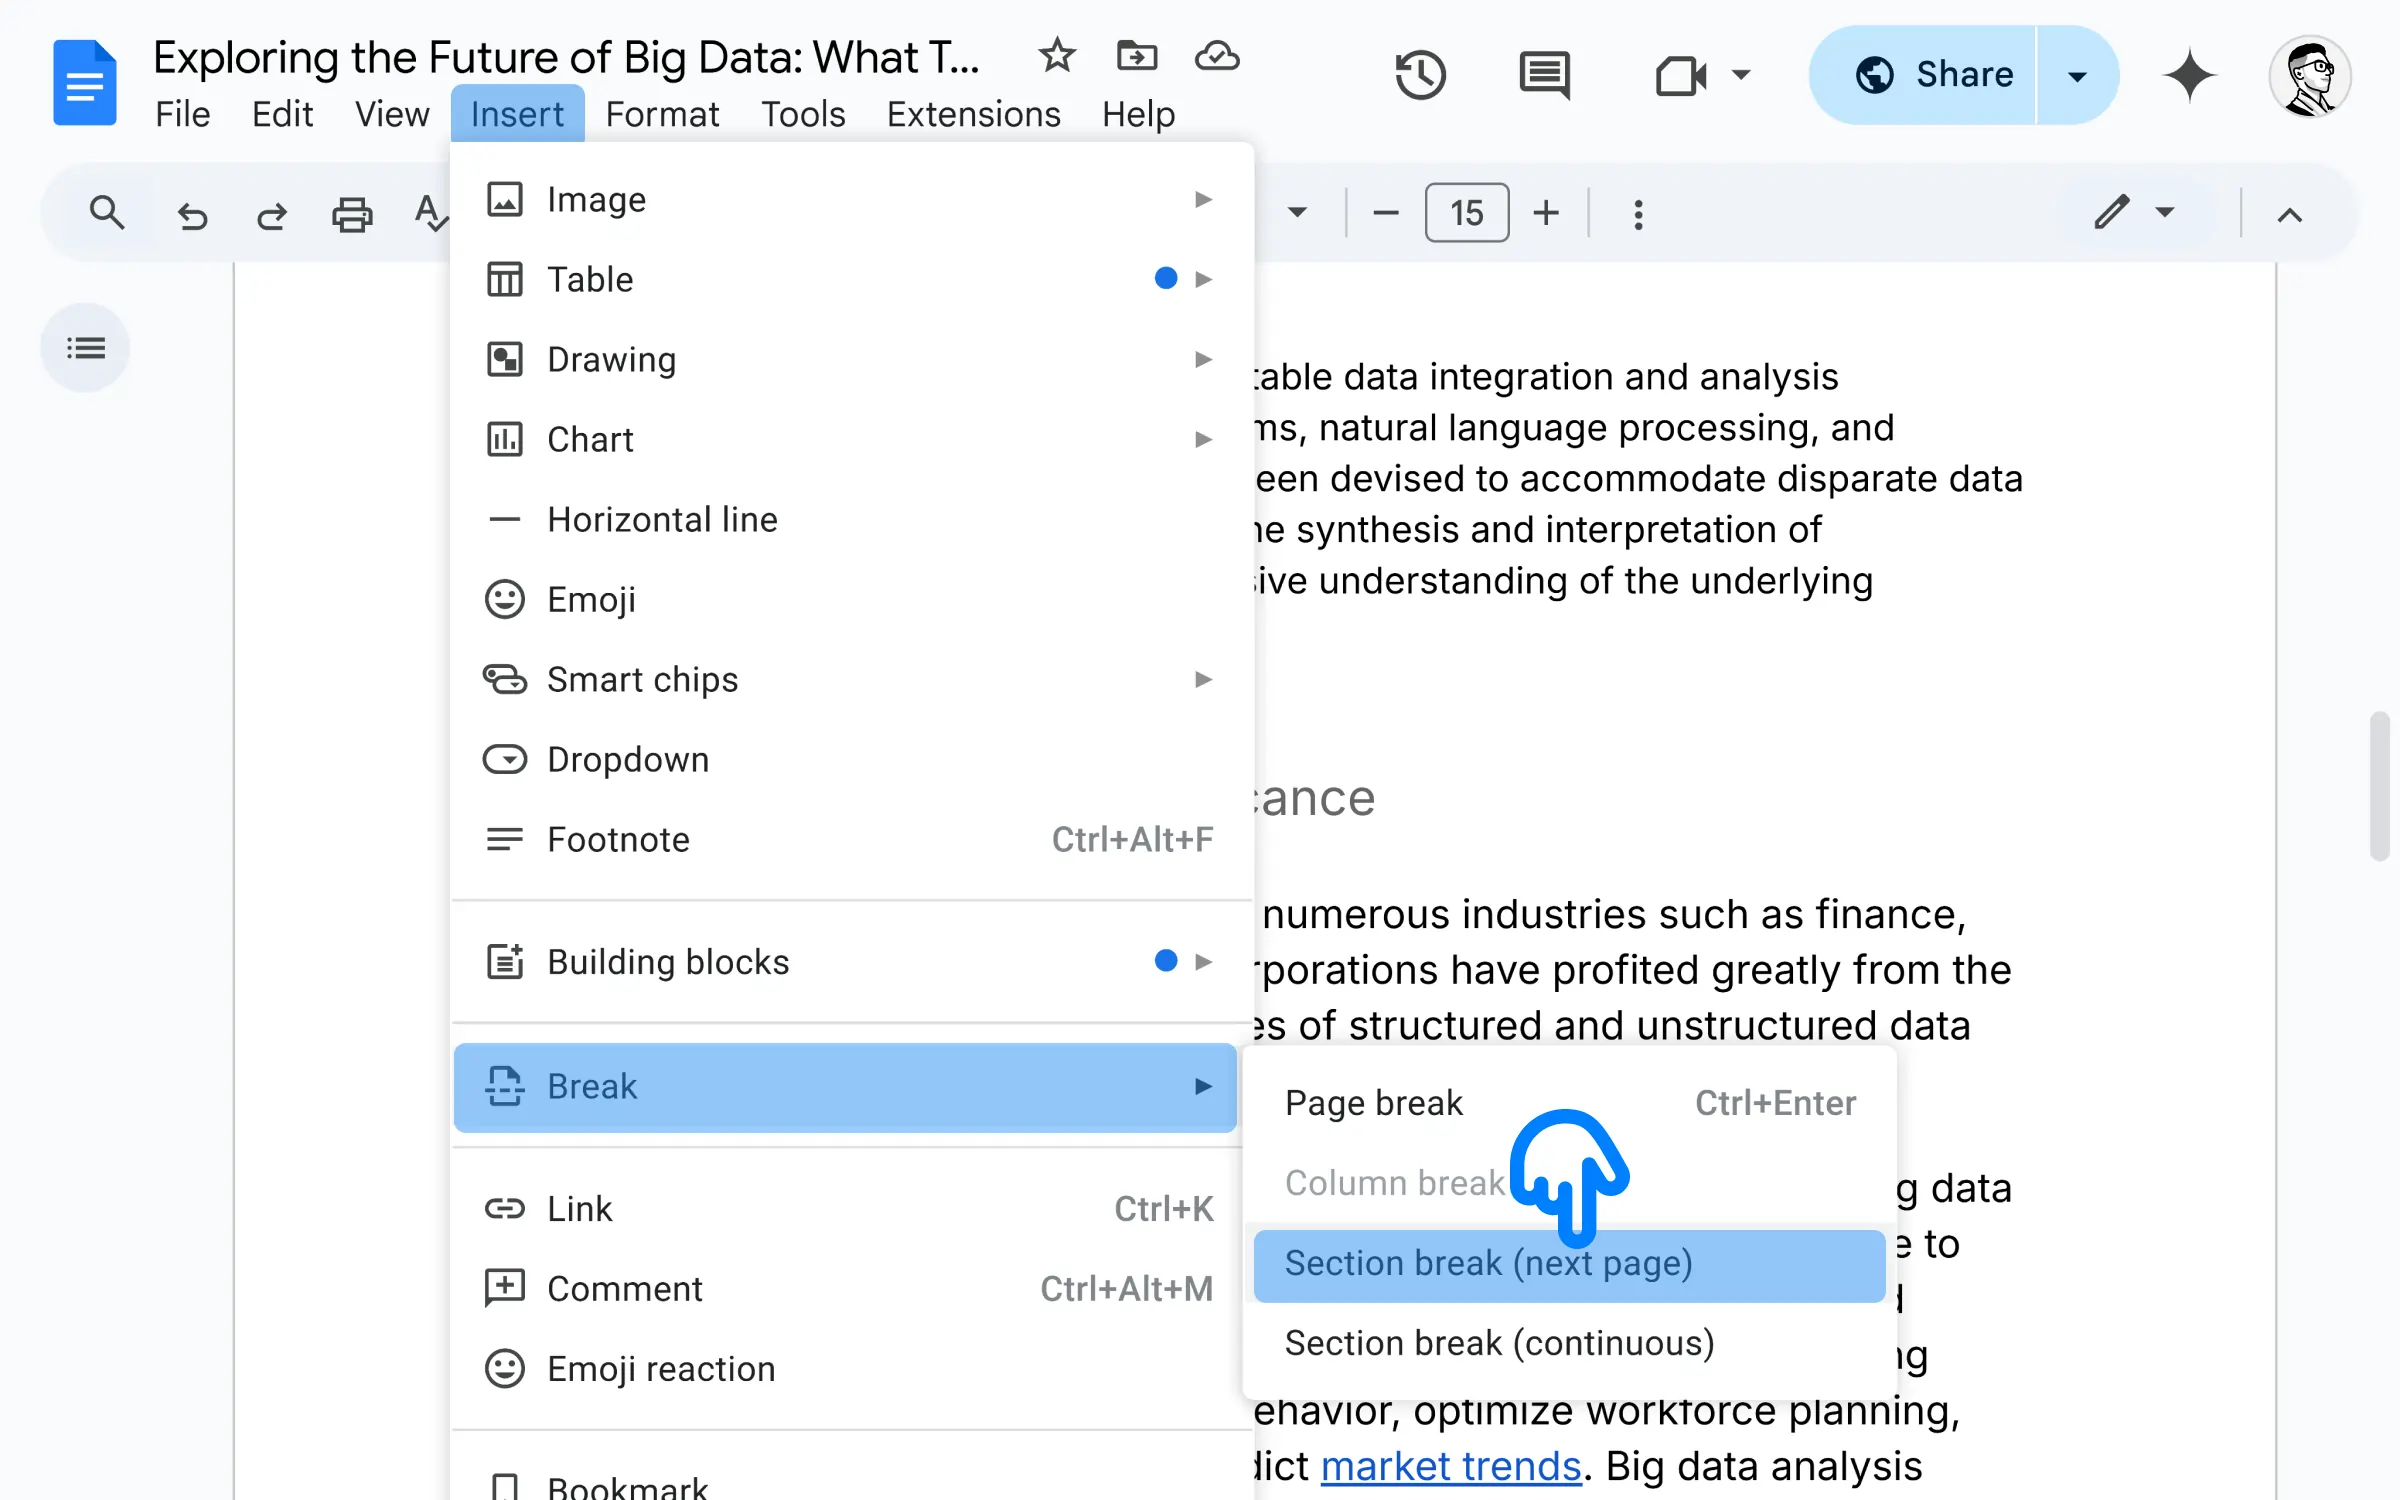
According to this style, page numbers should be in the top right corner of each page, about half an inch from the top edge and lined up with the right margin.
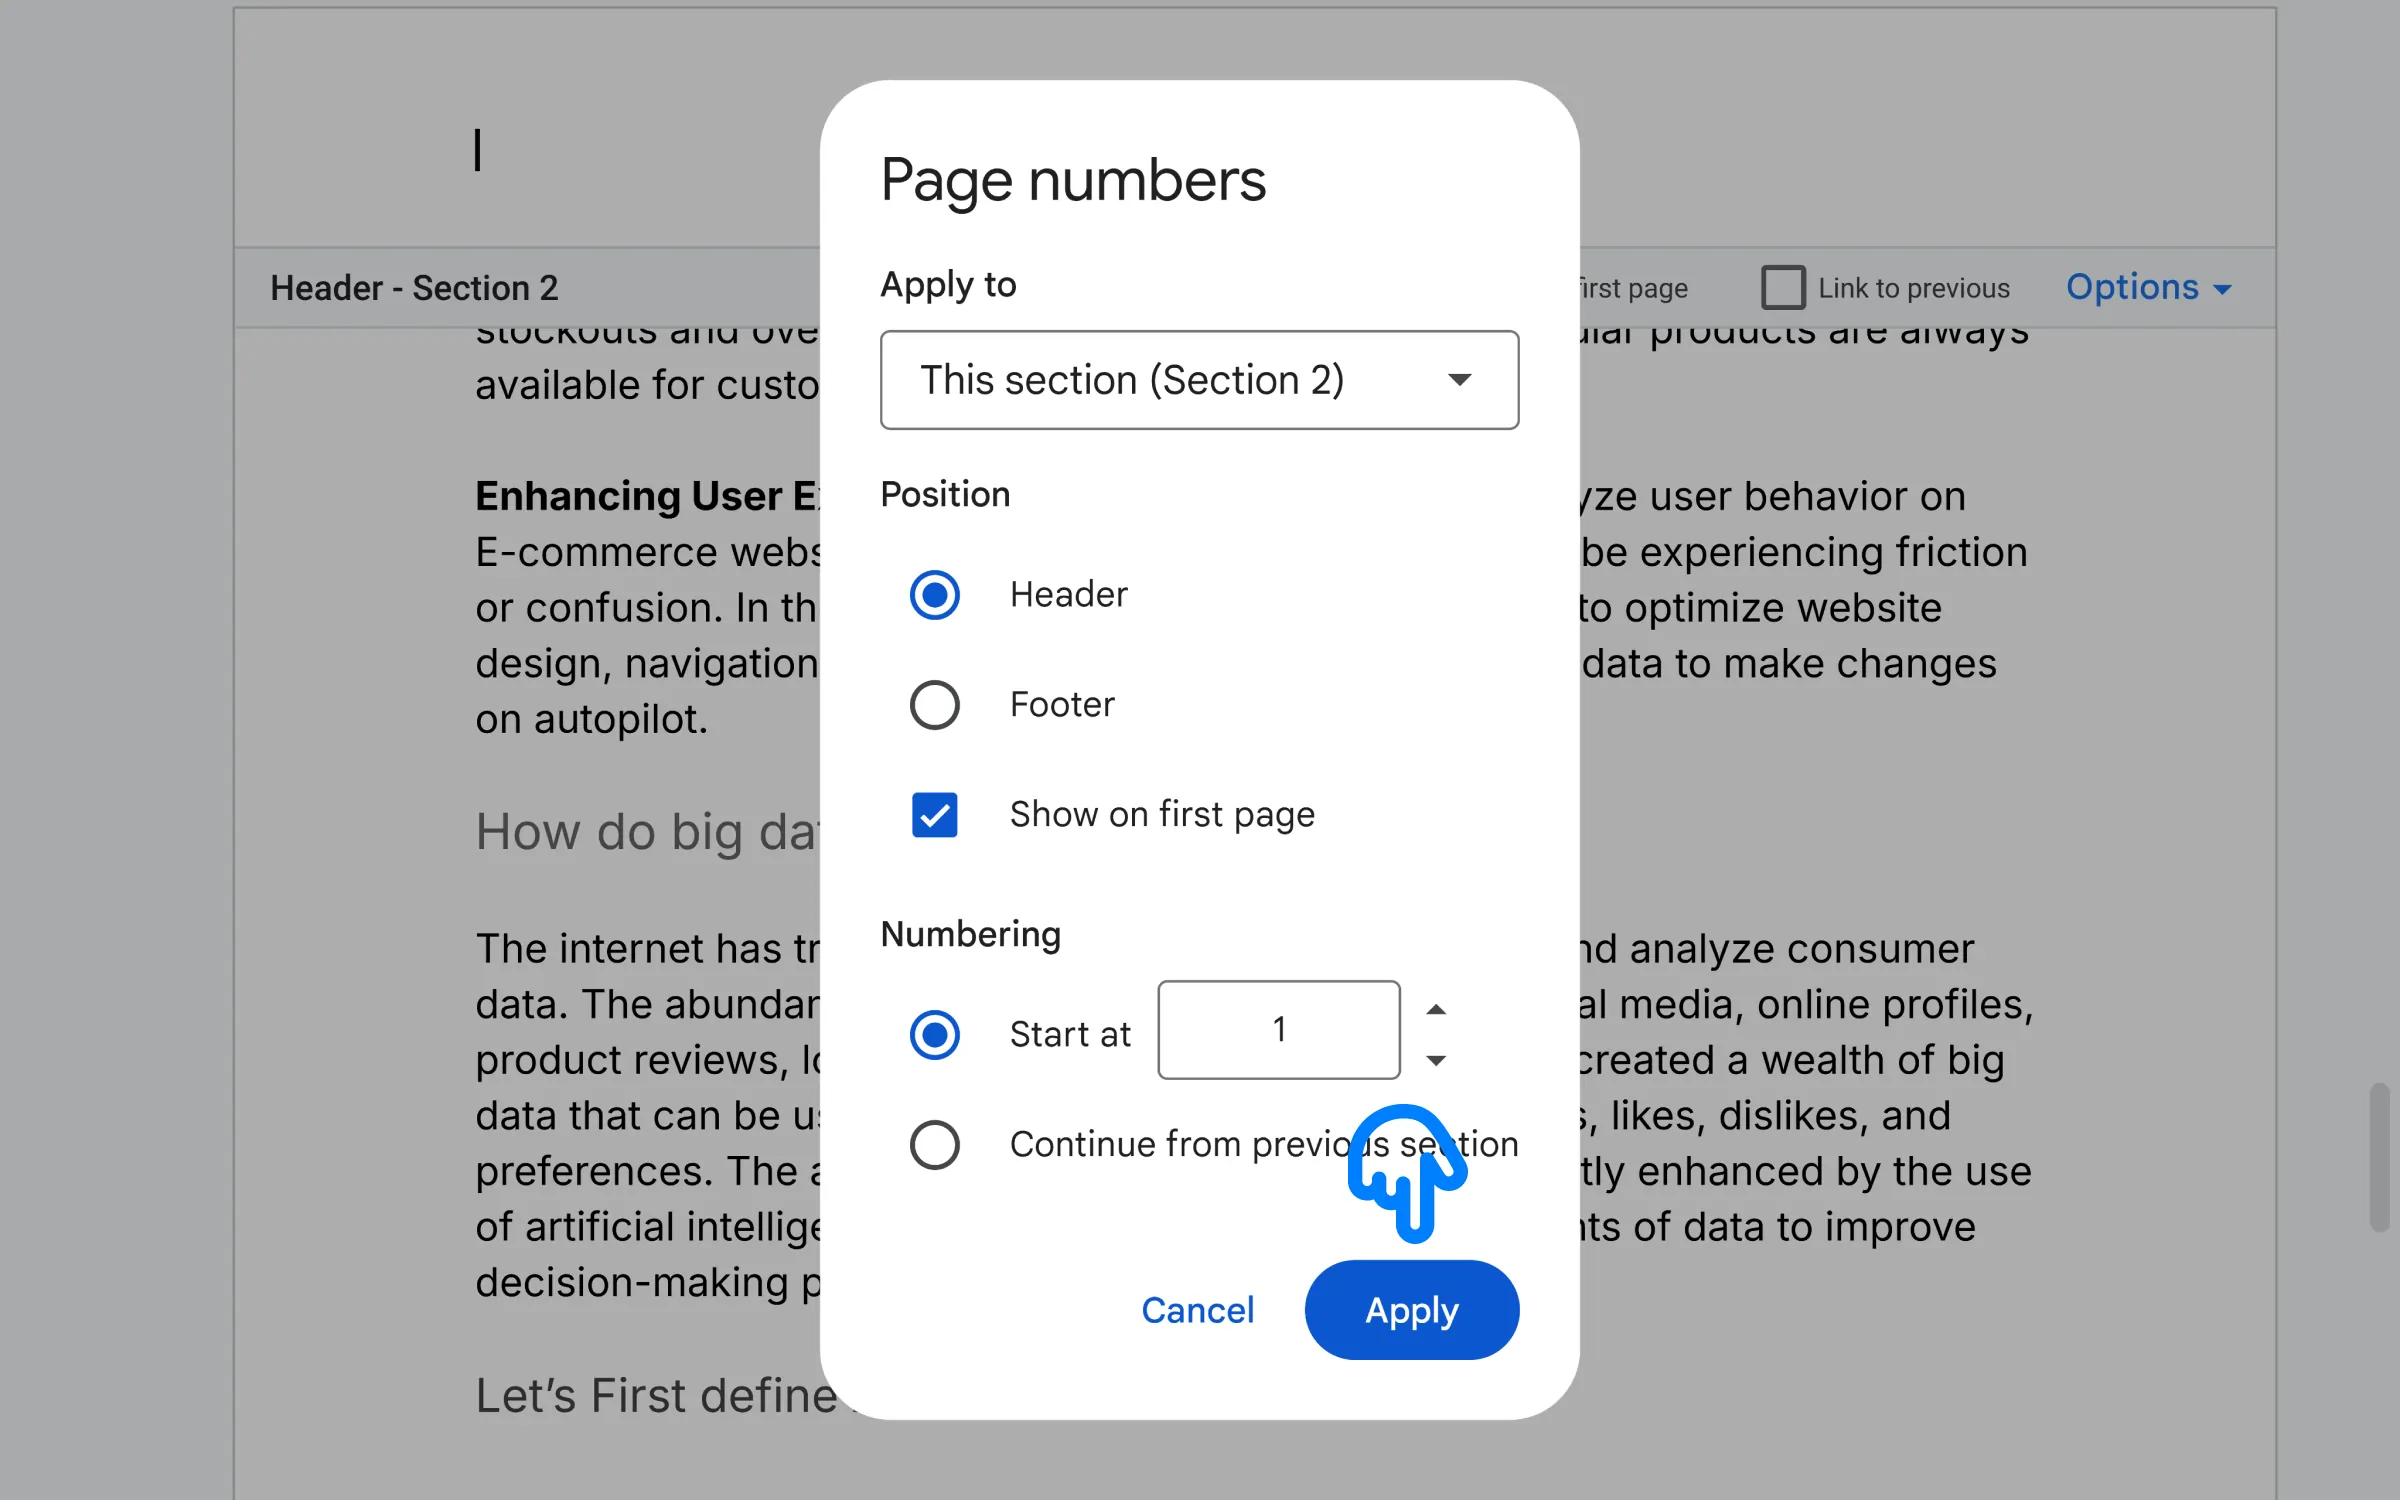
To achieve this in Google Docs, we need to select the first option in our page number menu.
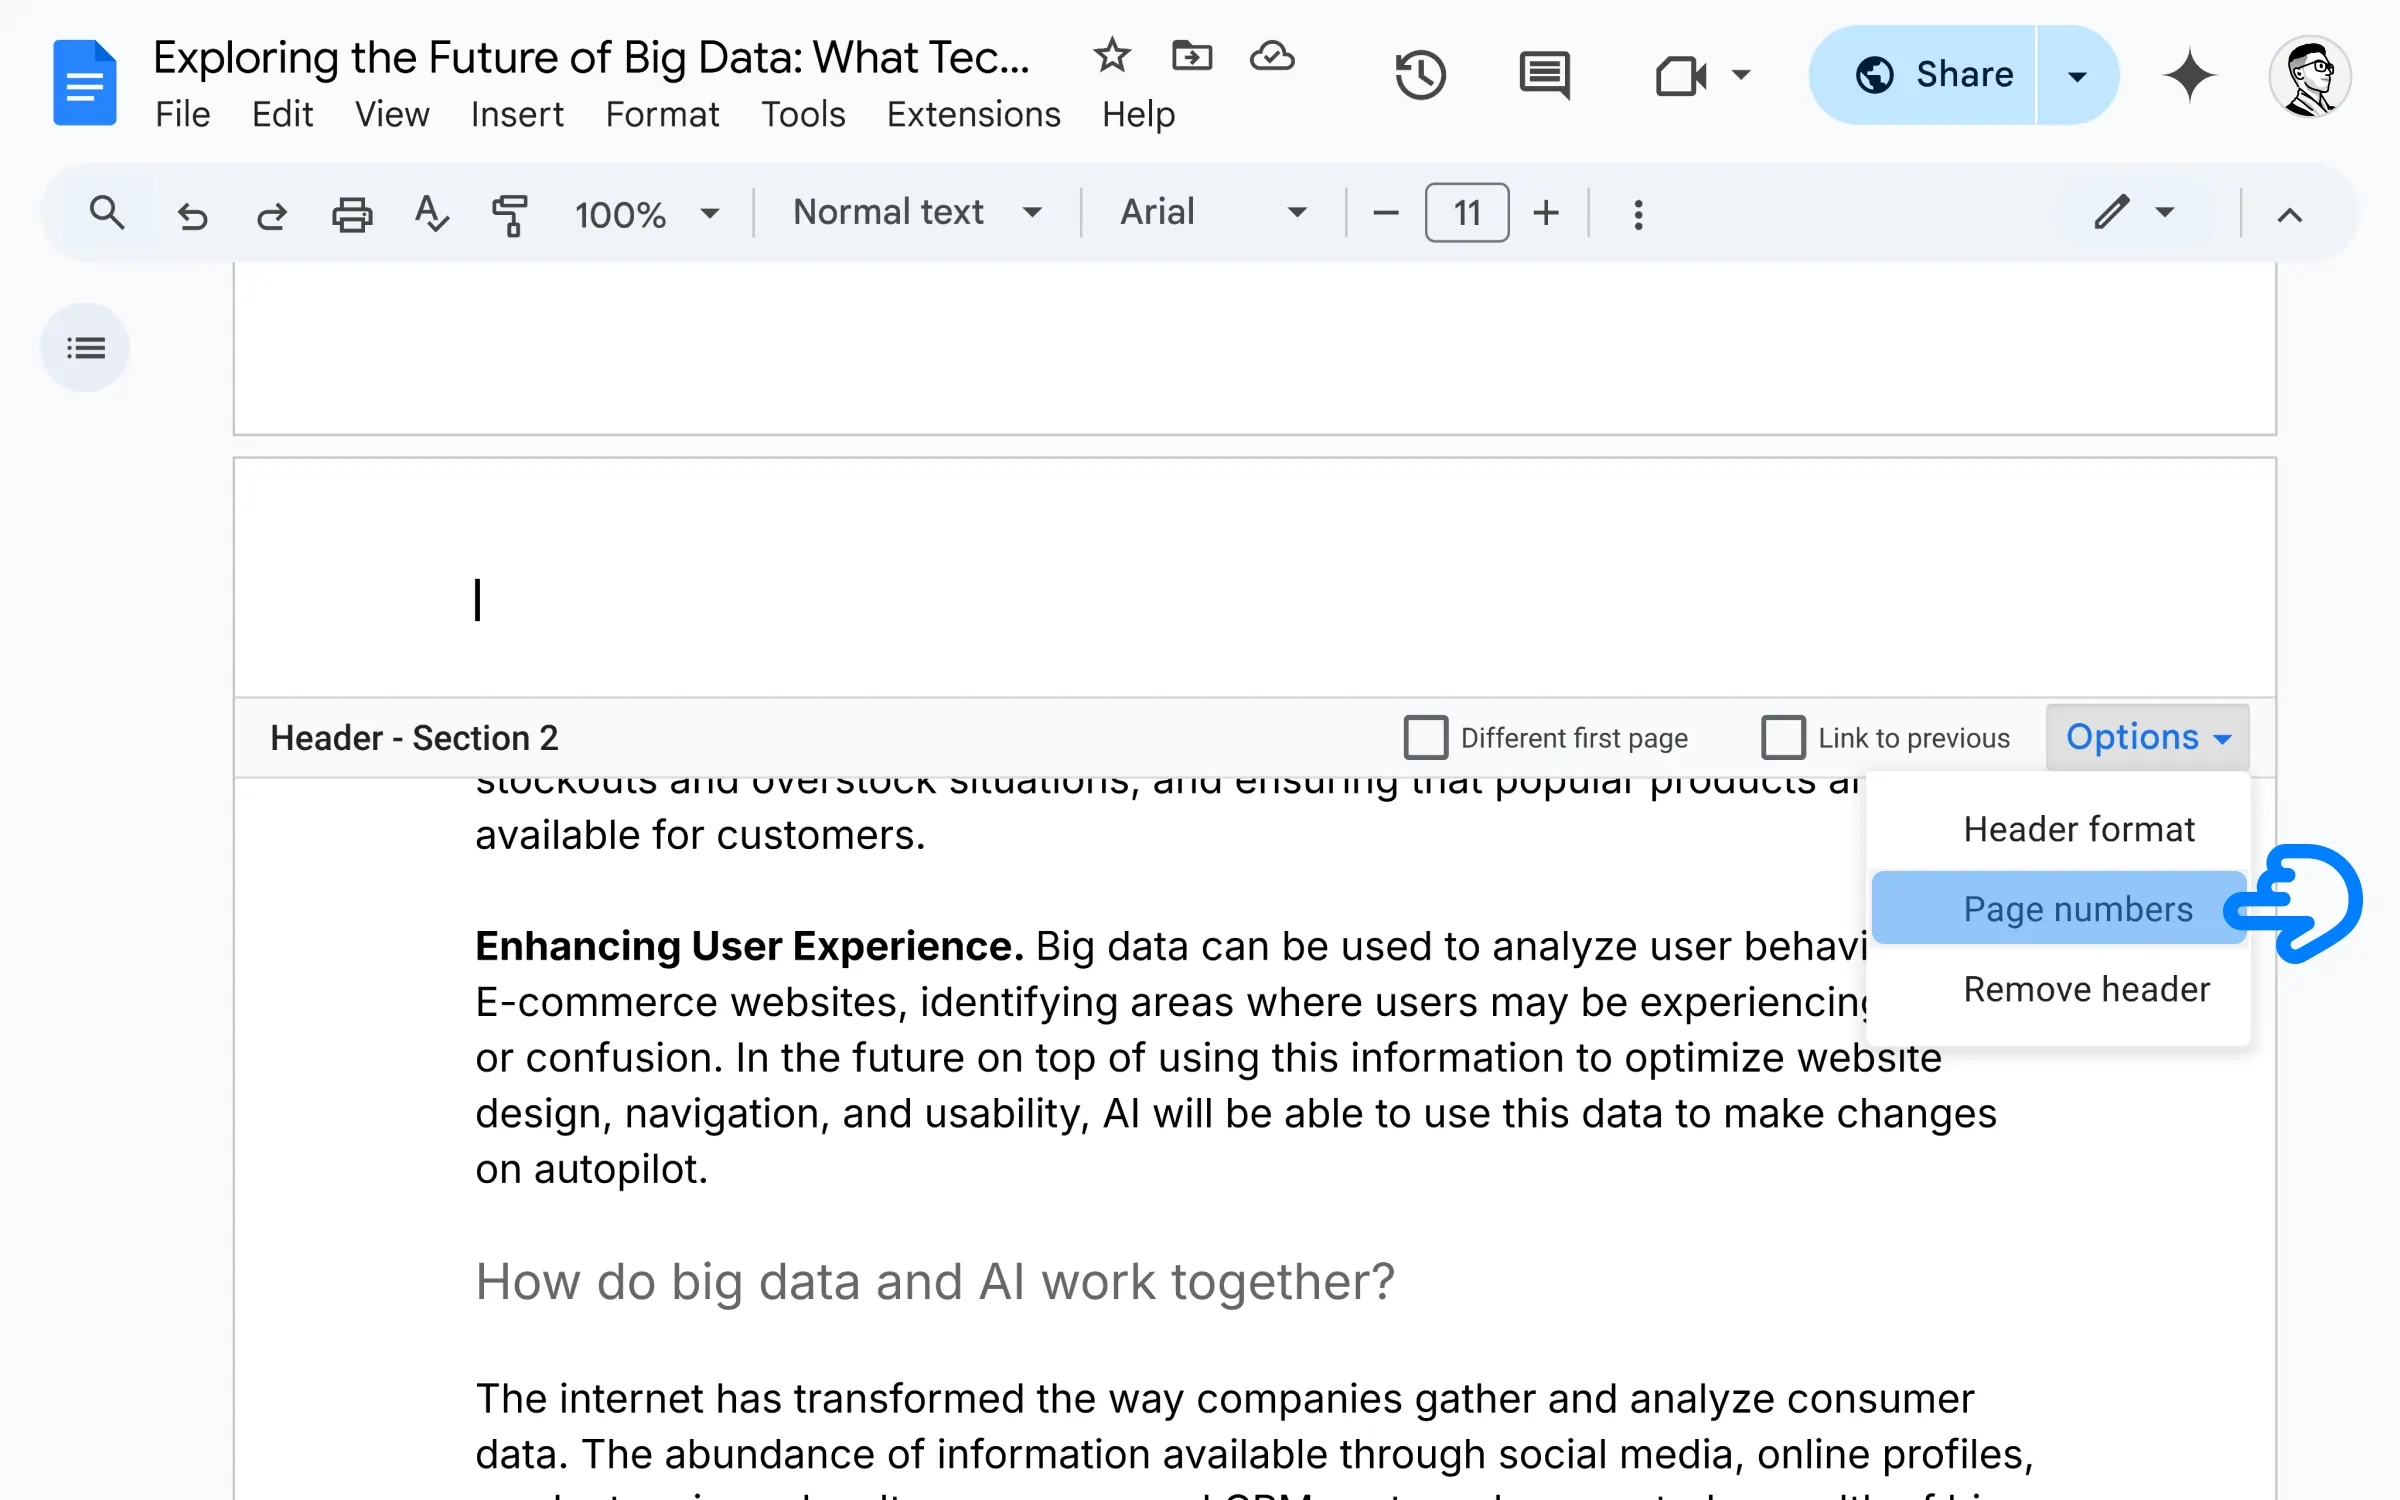
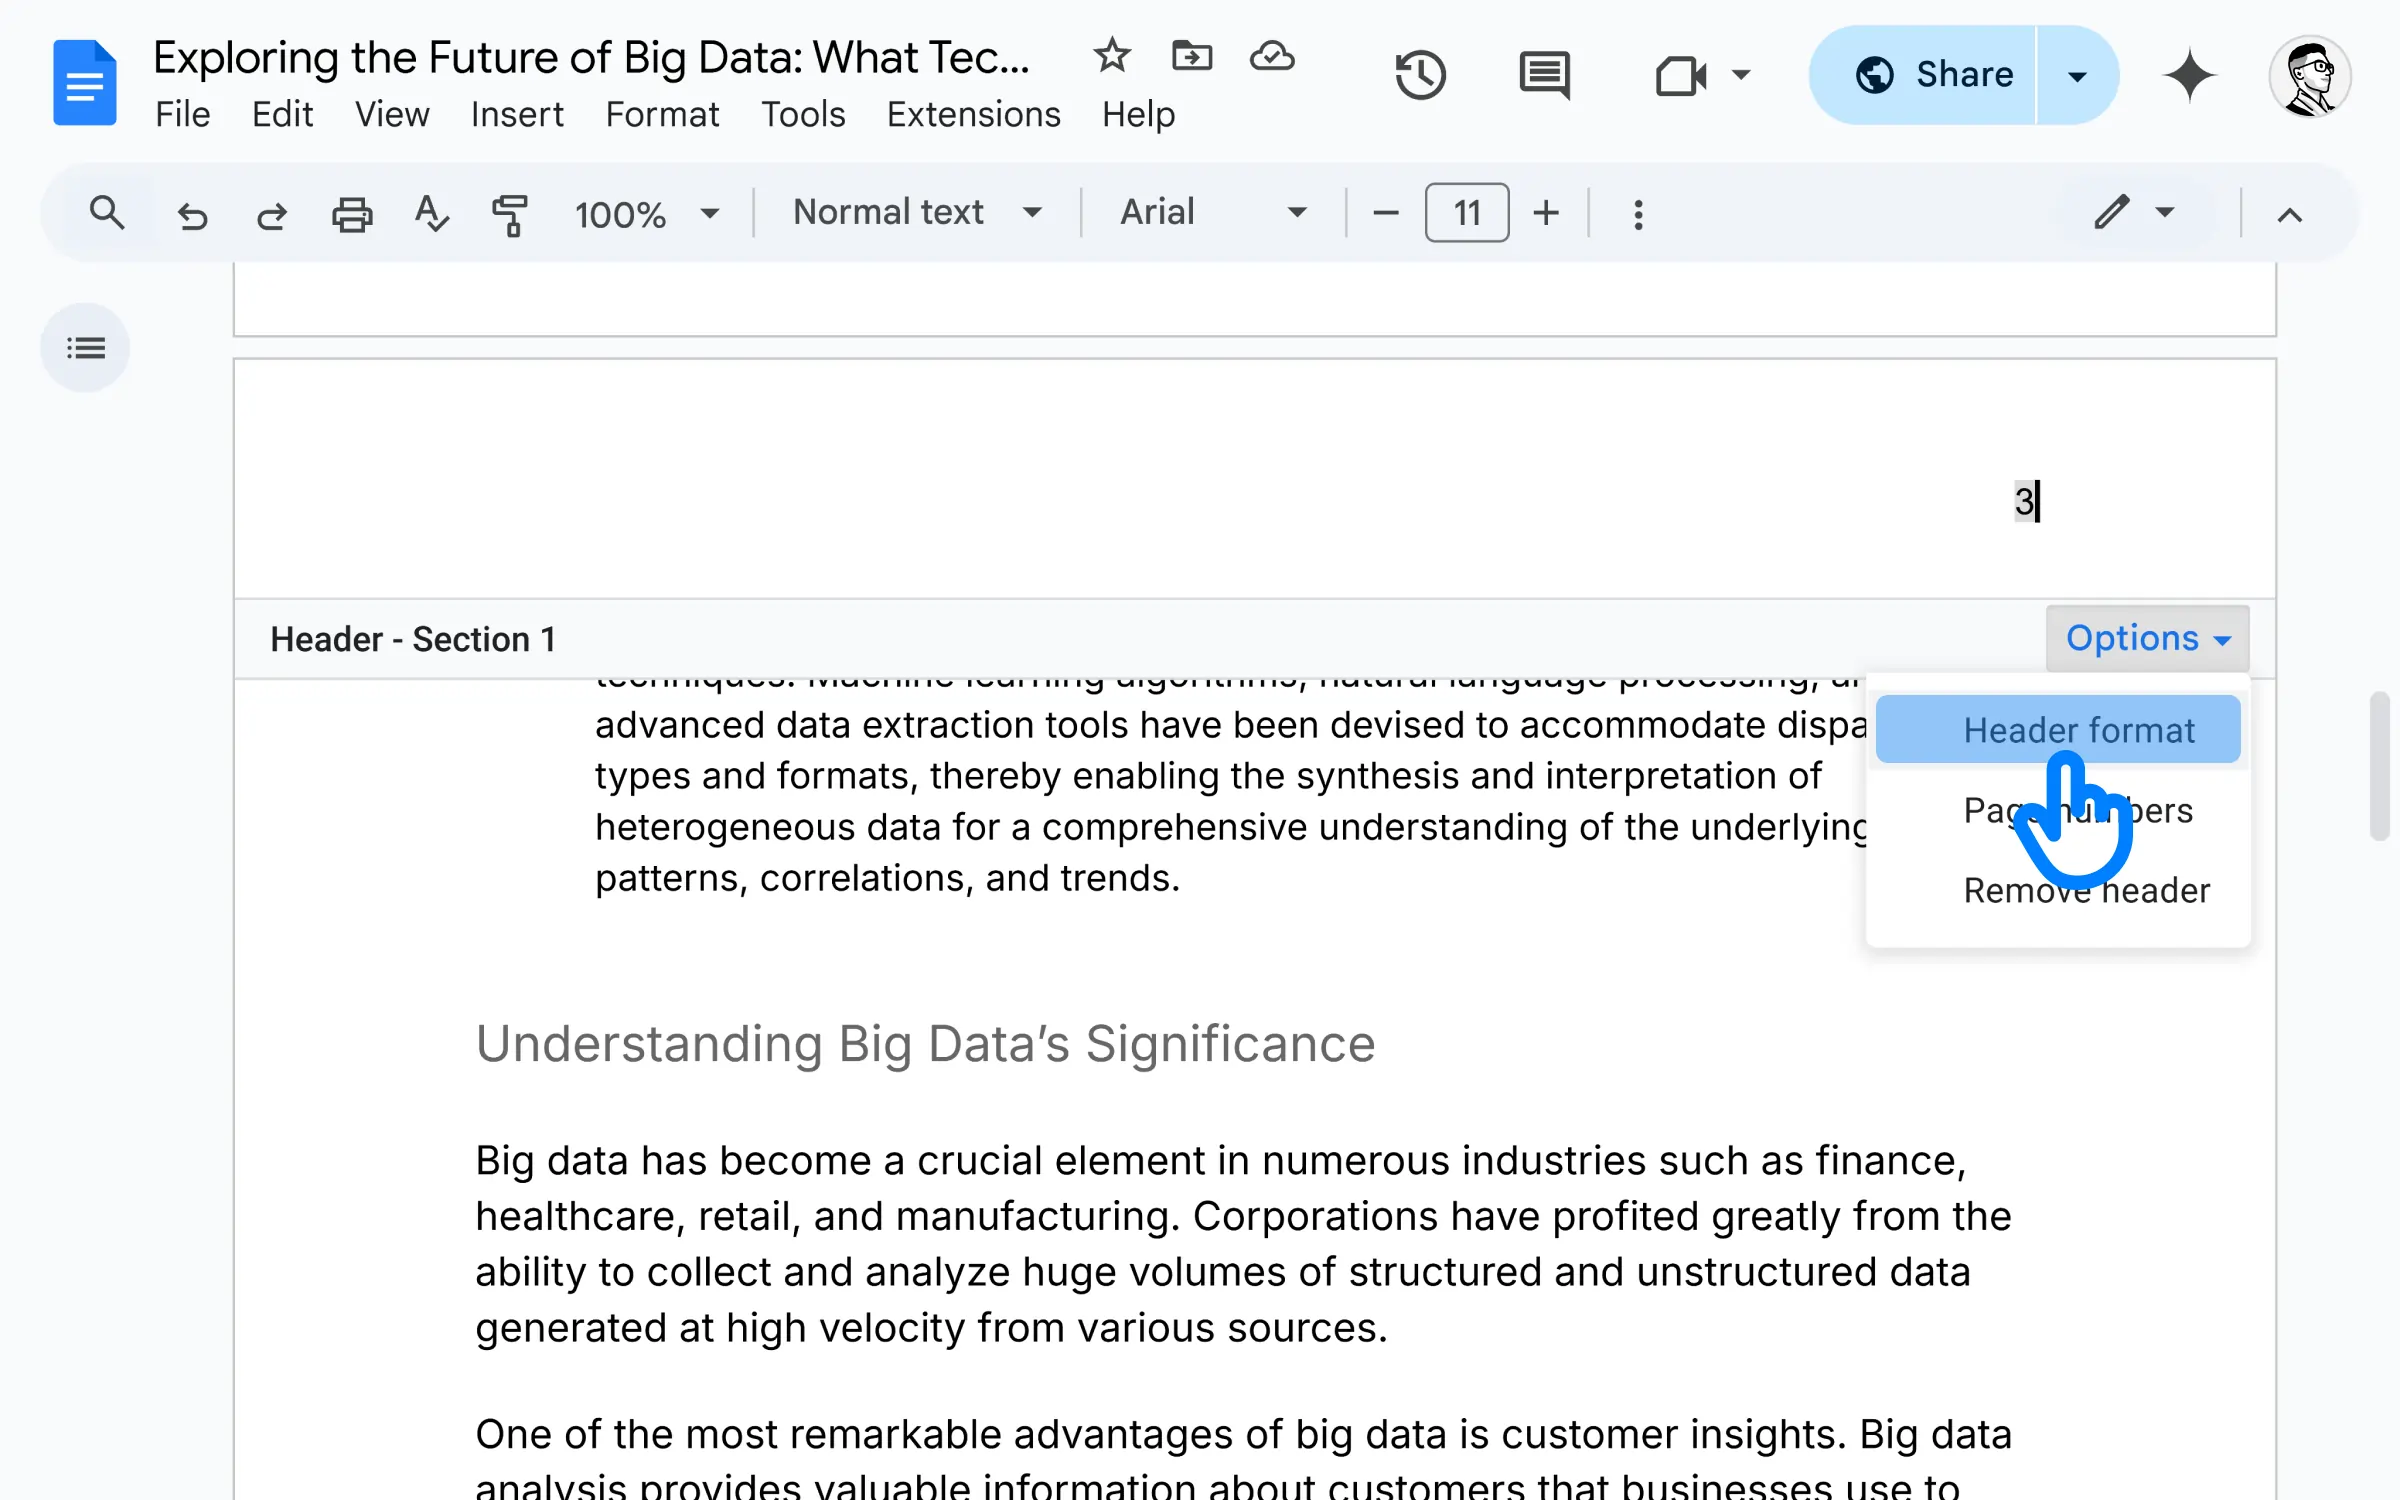
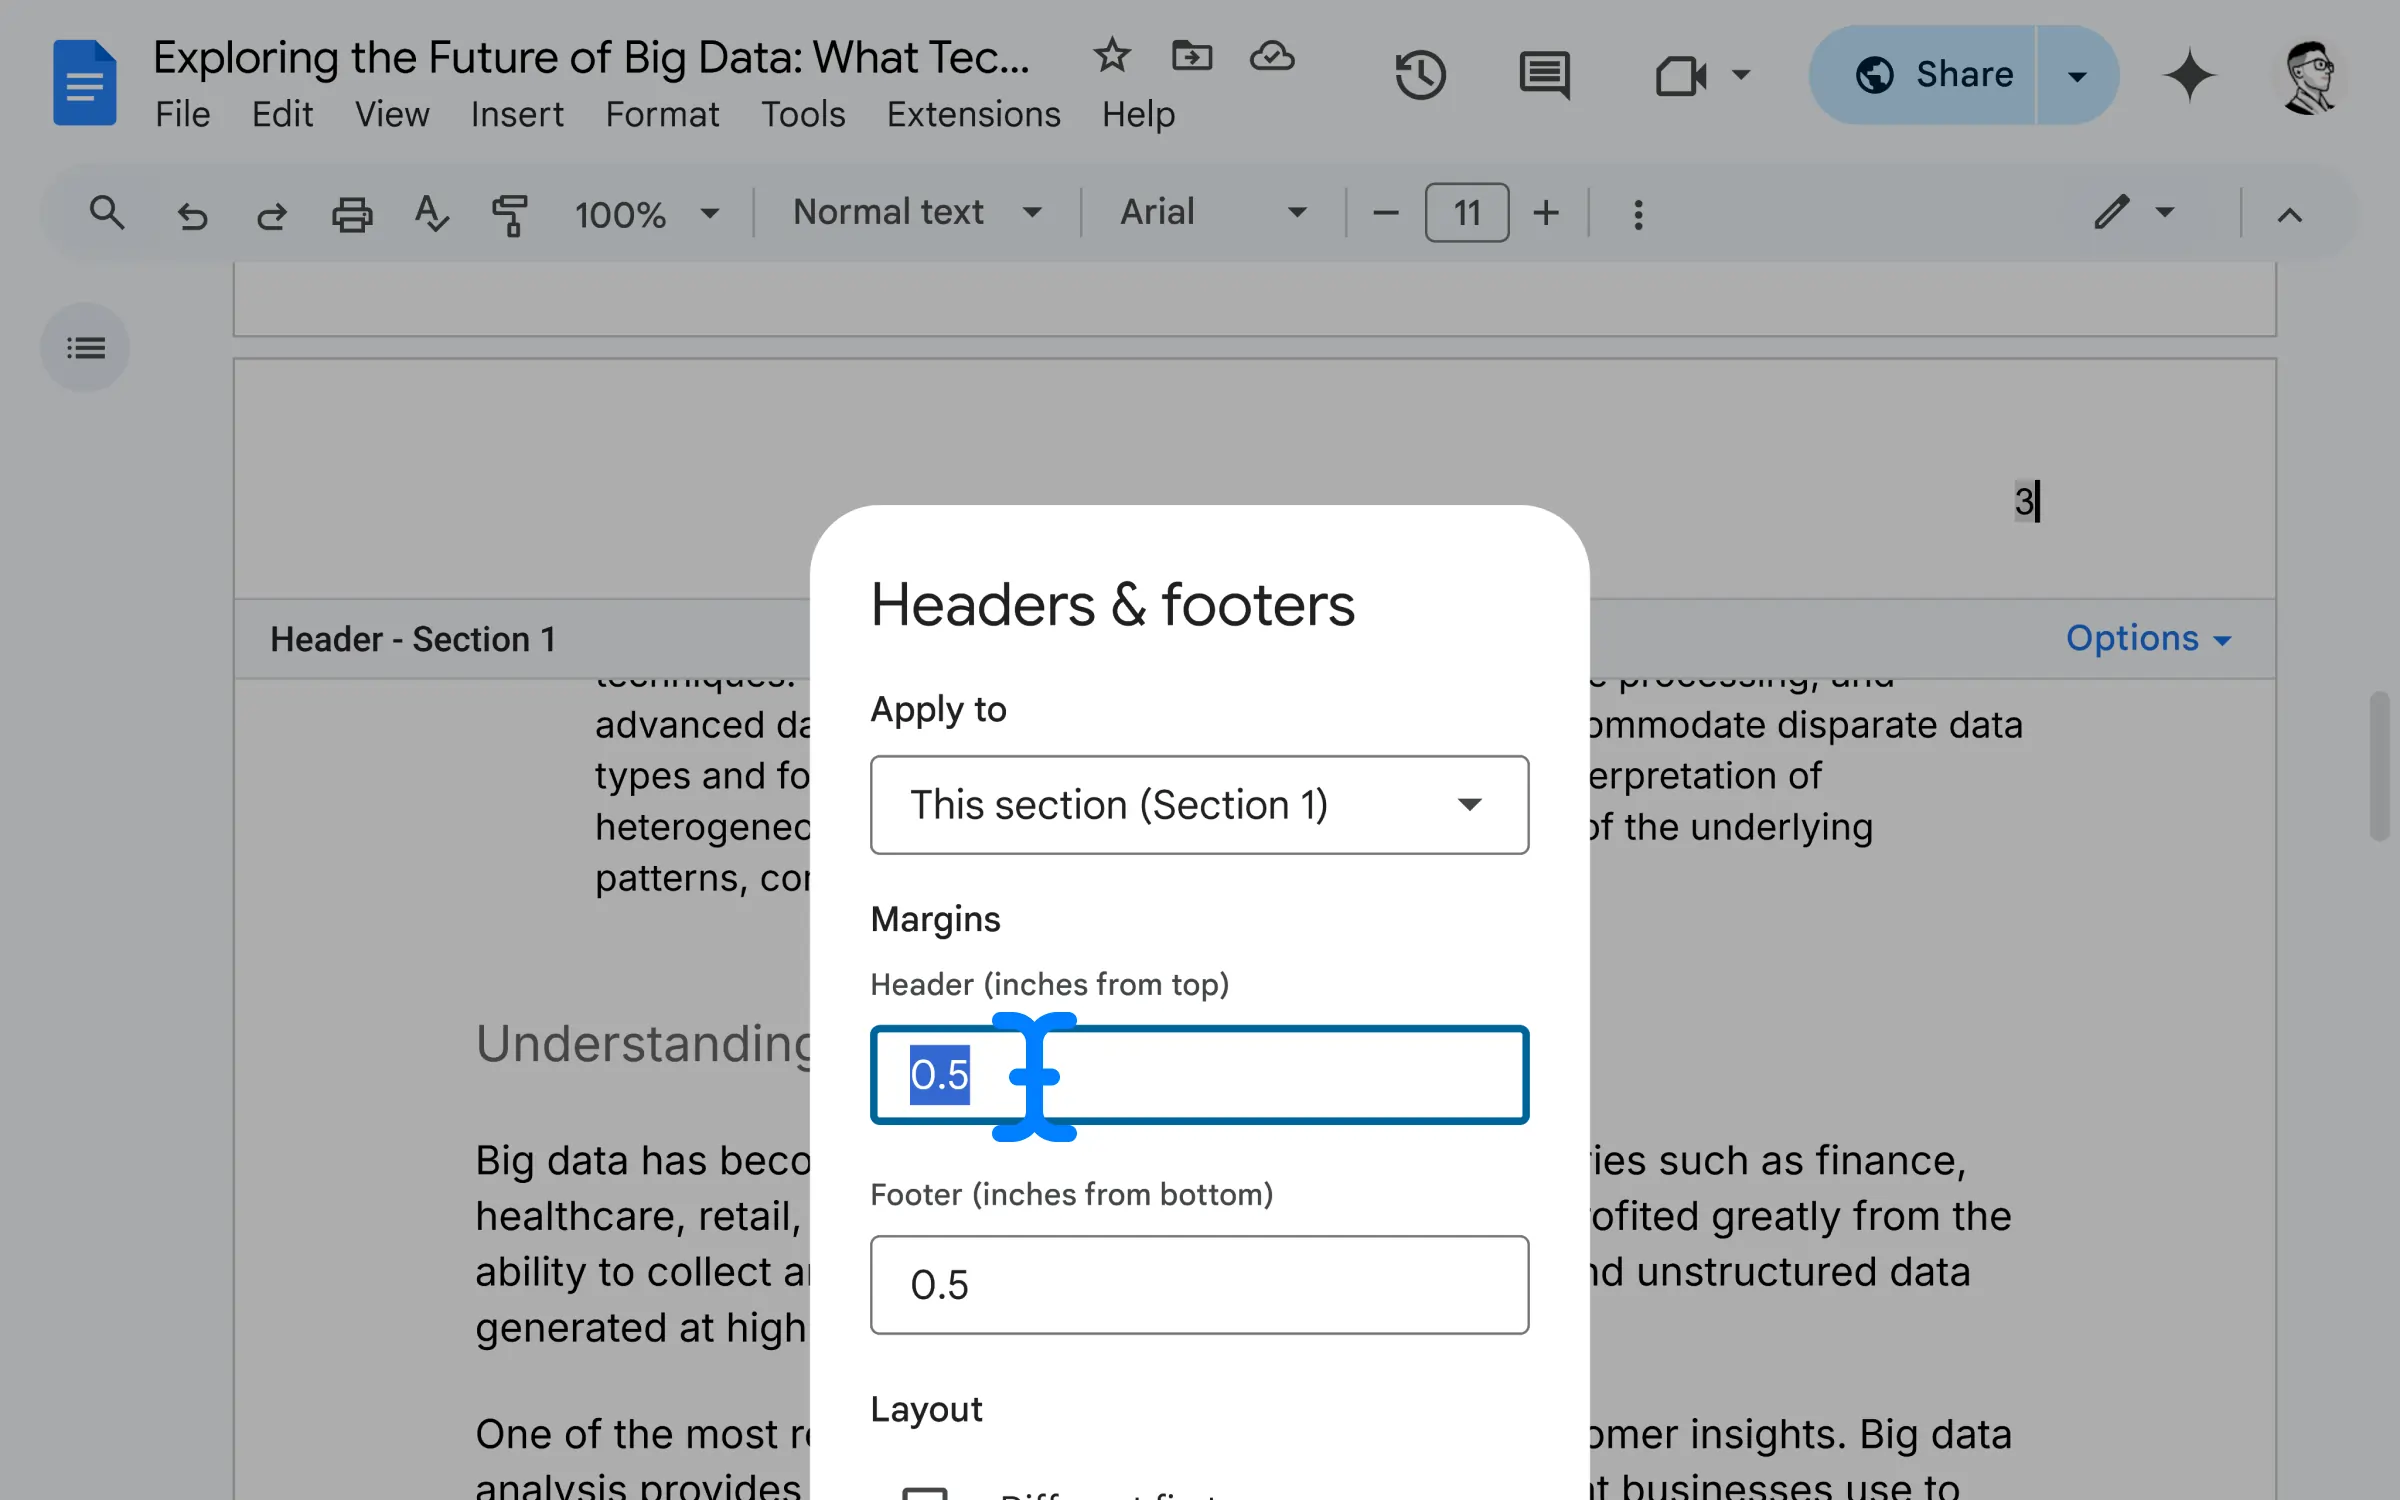
Then go to: “Options” > “Header Format“.
Set the value of “Header (inches from top)“ to 0.5.
Hit Apply!
@Author
What?
Sorry, I was on my phone …
@Reader
👀 No problem!
Let’s see how to do this on mobile then.
How To Add Page Numbers In Google Docs iPad/mobile
For this example, I’ll be using my phone.
Just fire up Google Docs in your iPad or mobile.
Go to your Document & Tap the edit button at the bottom.
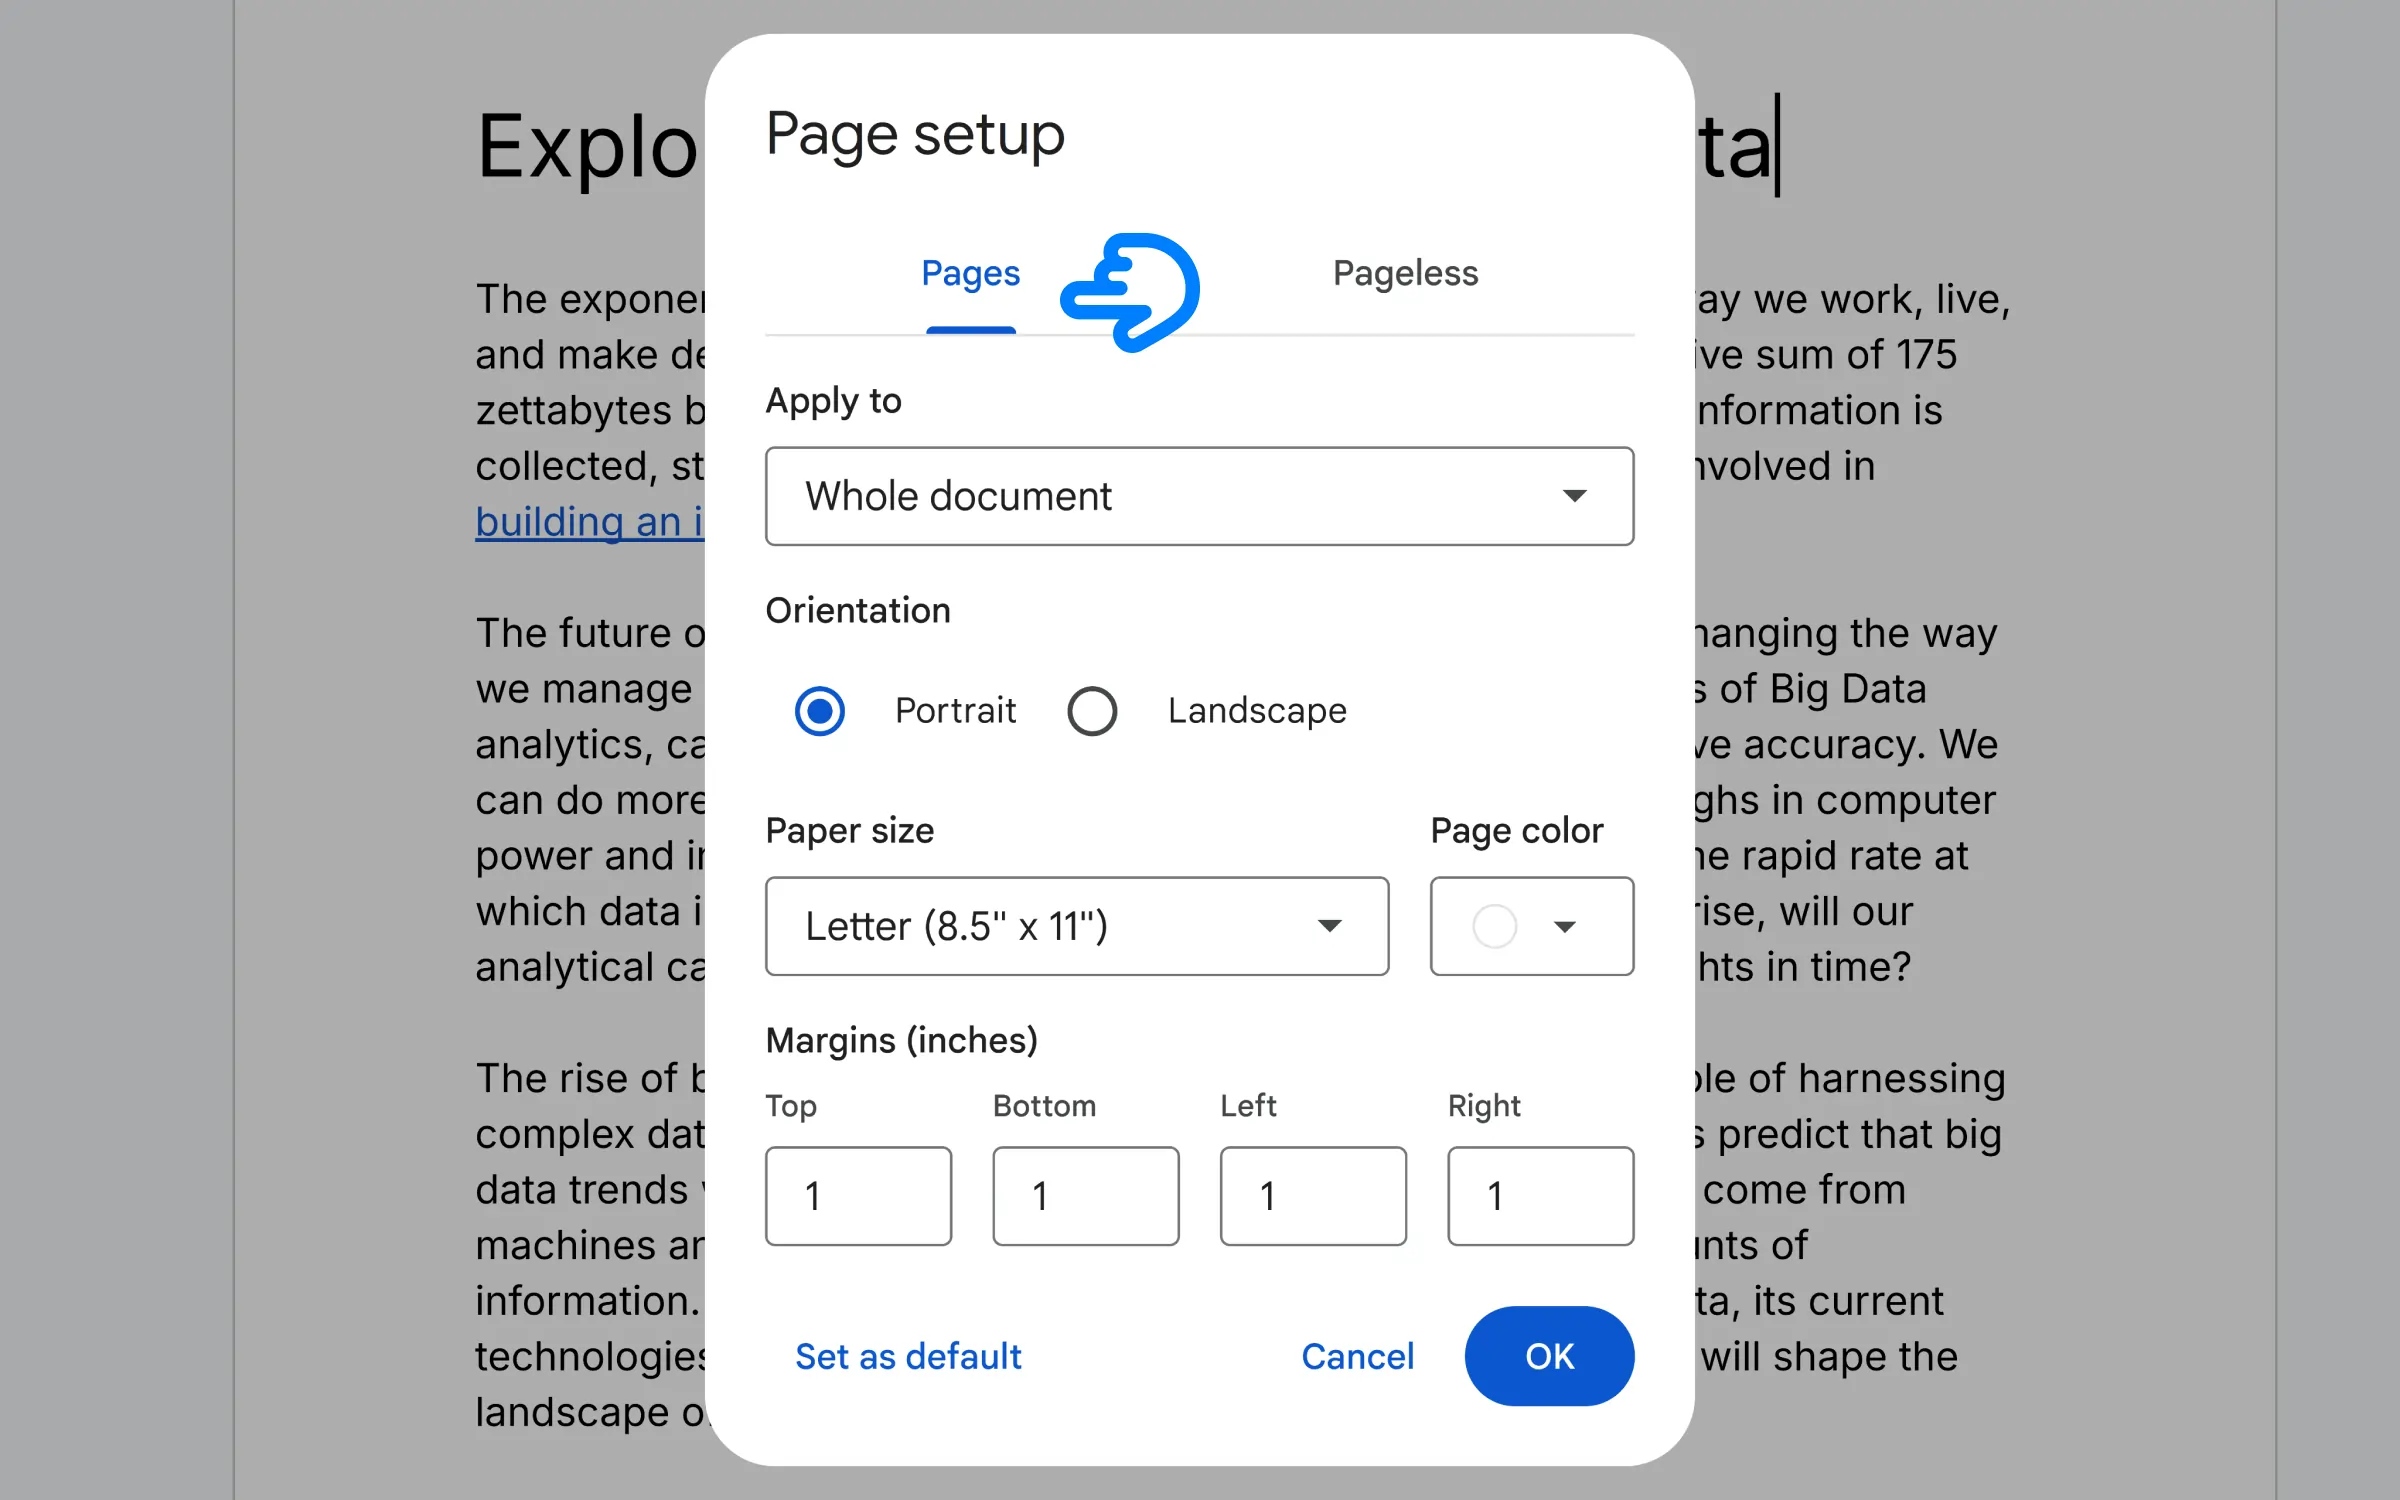
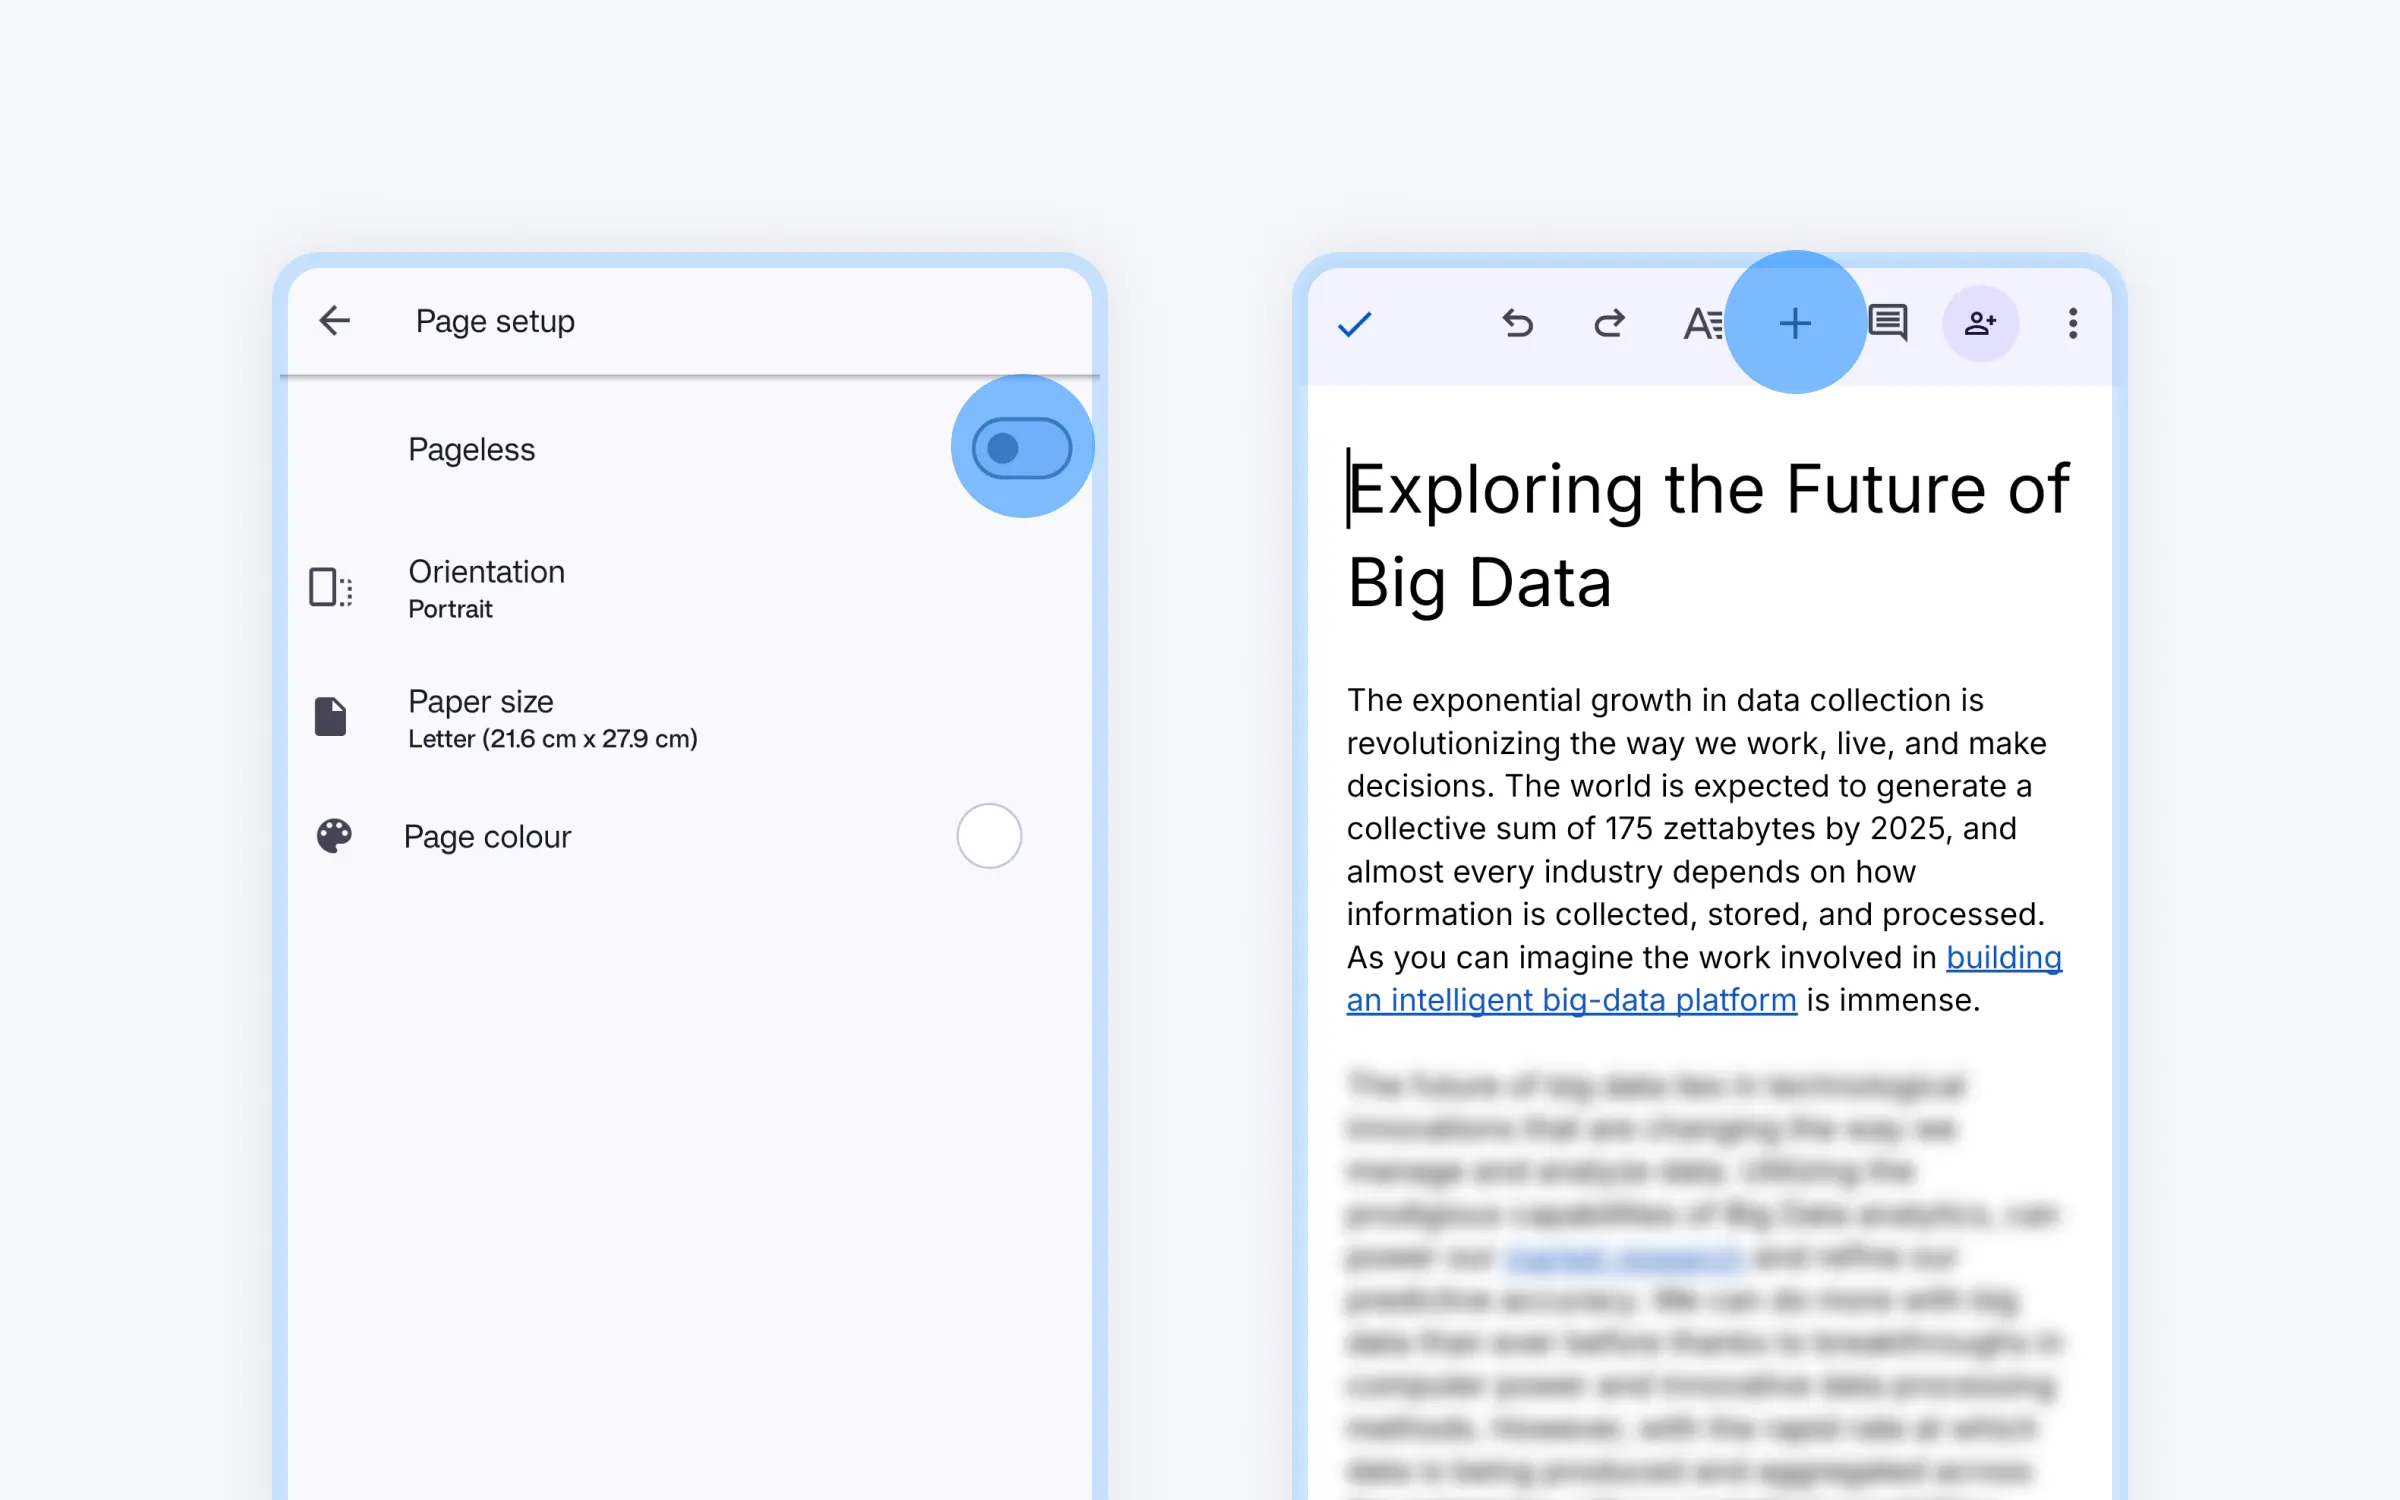
Also make sure you’re NOT in Pageless Mode.
To check this tap on the three dots on the top right and go to “Page setup“.
Then disable the “Pageless“ option.
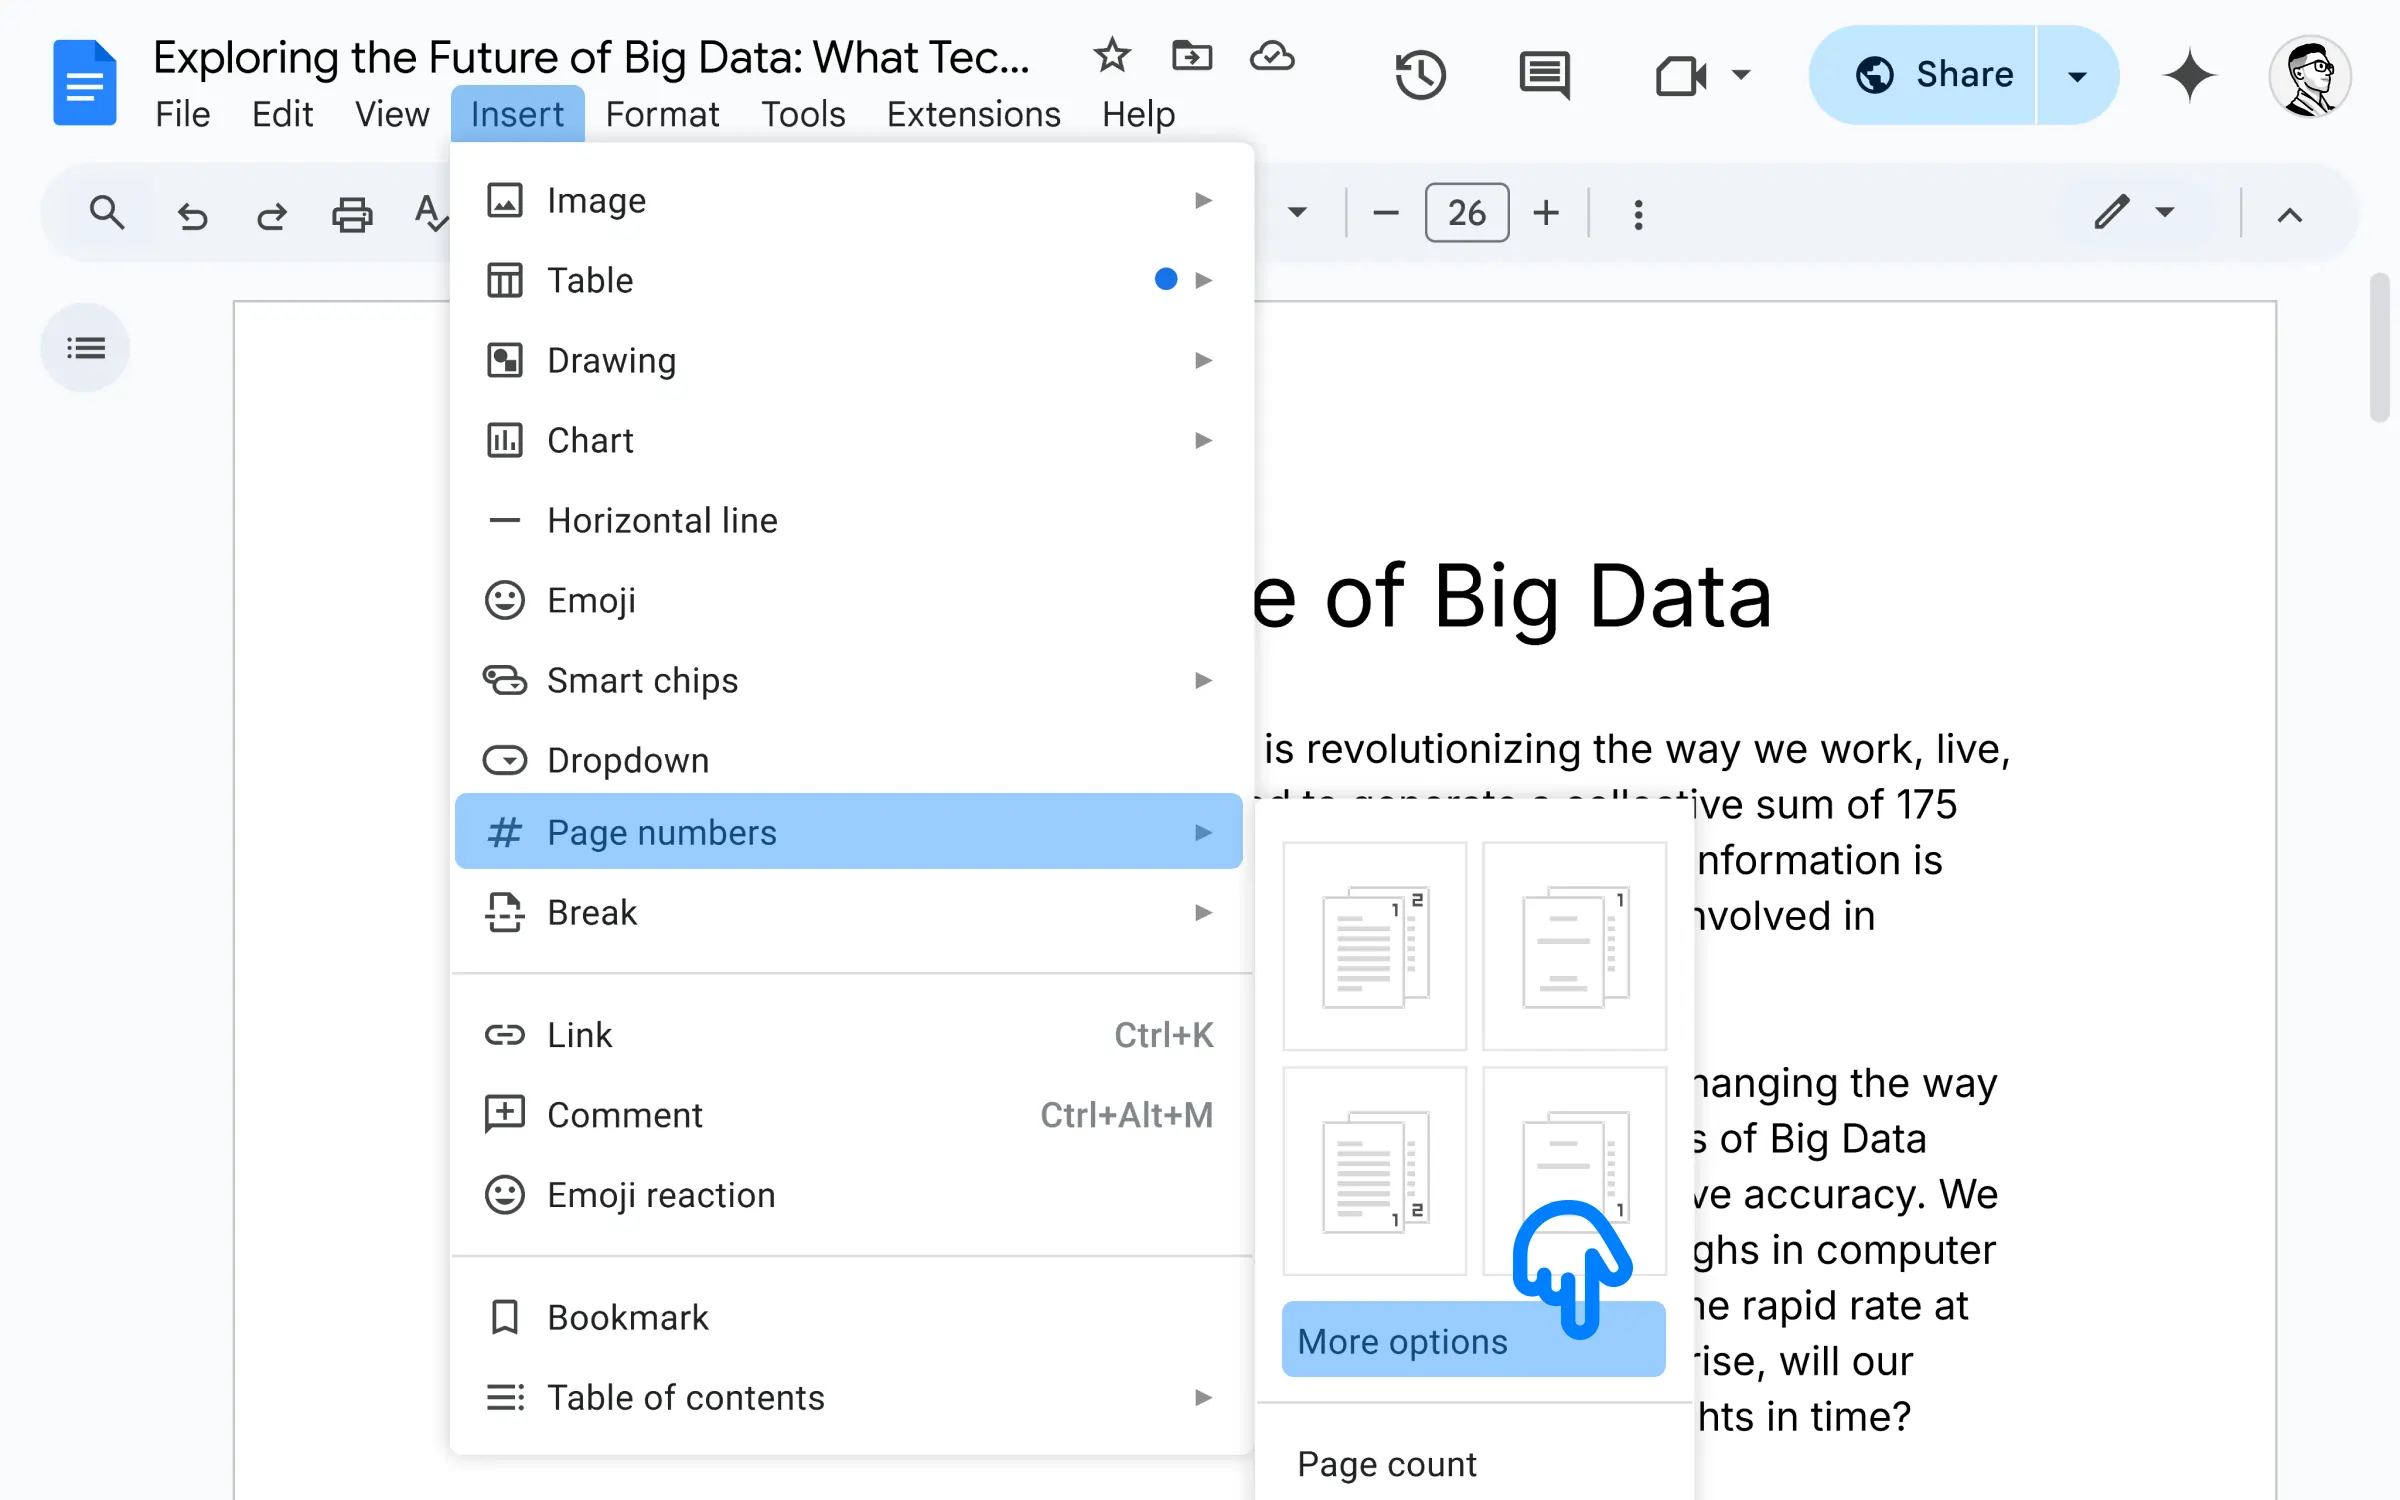
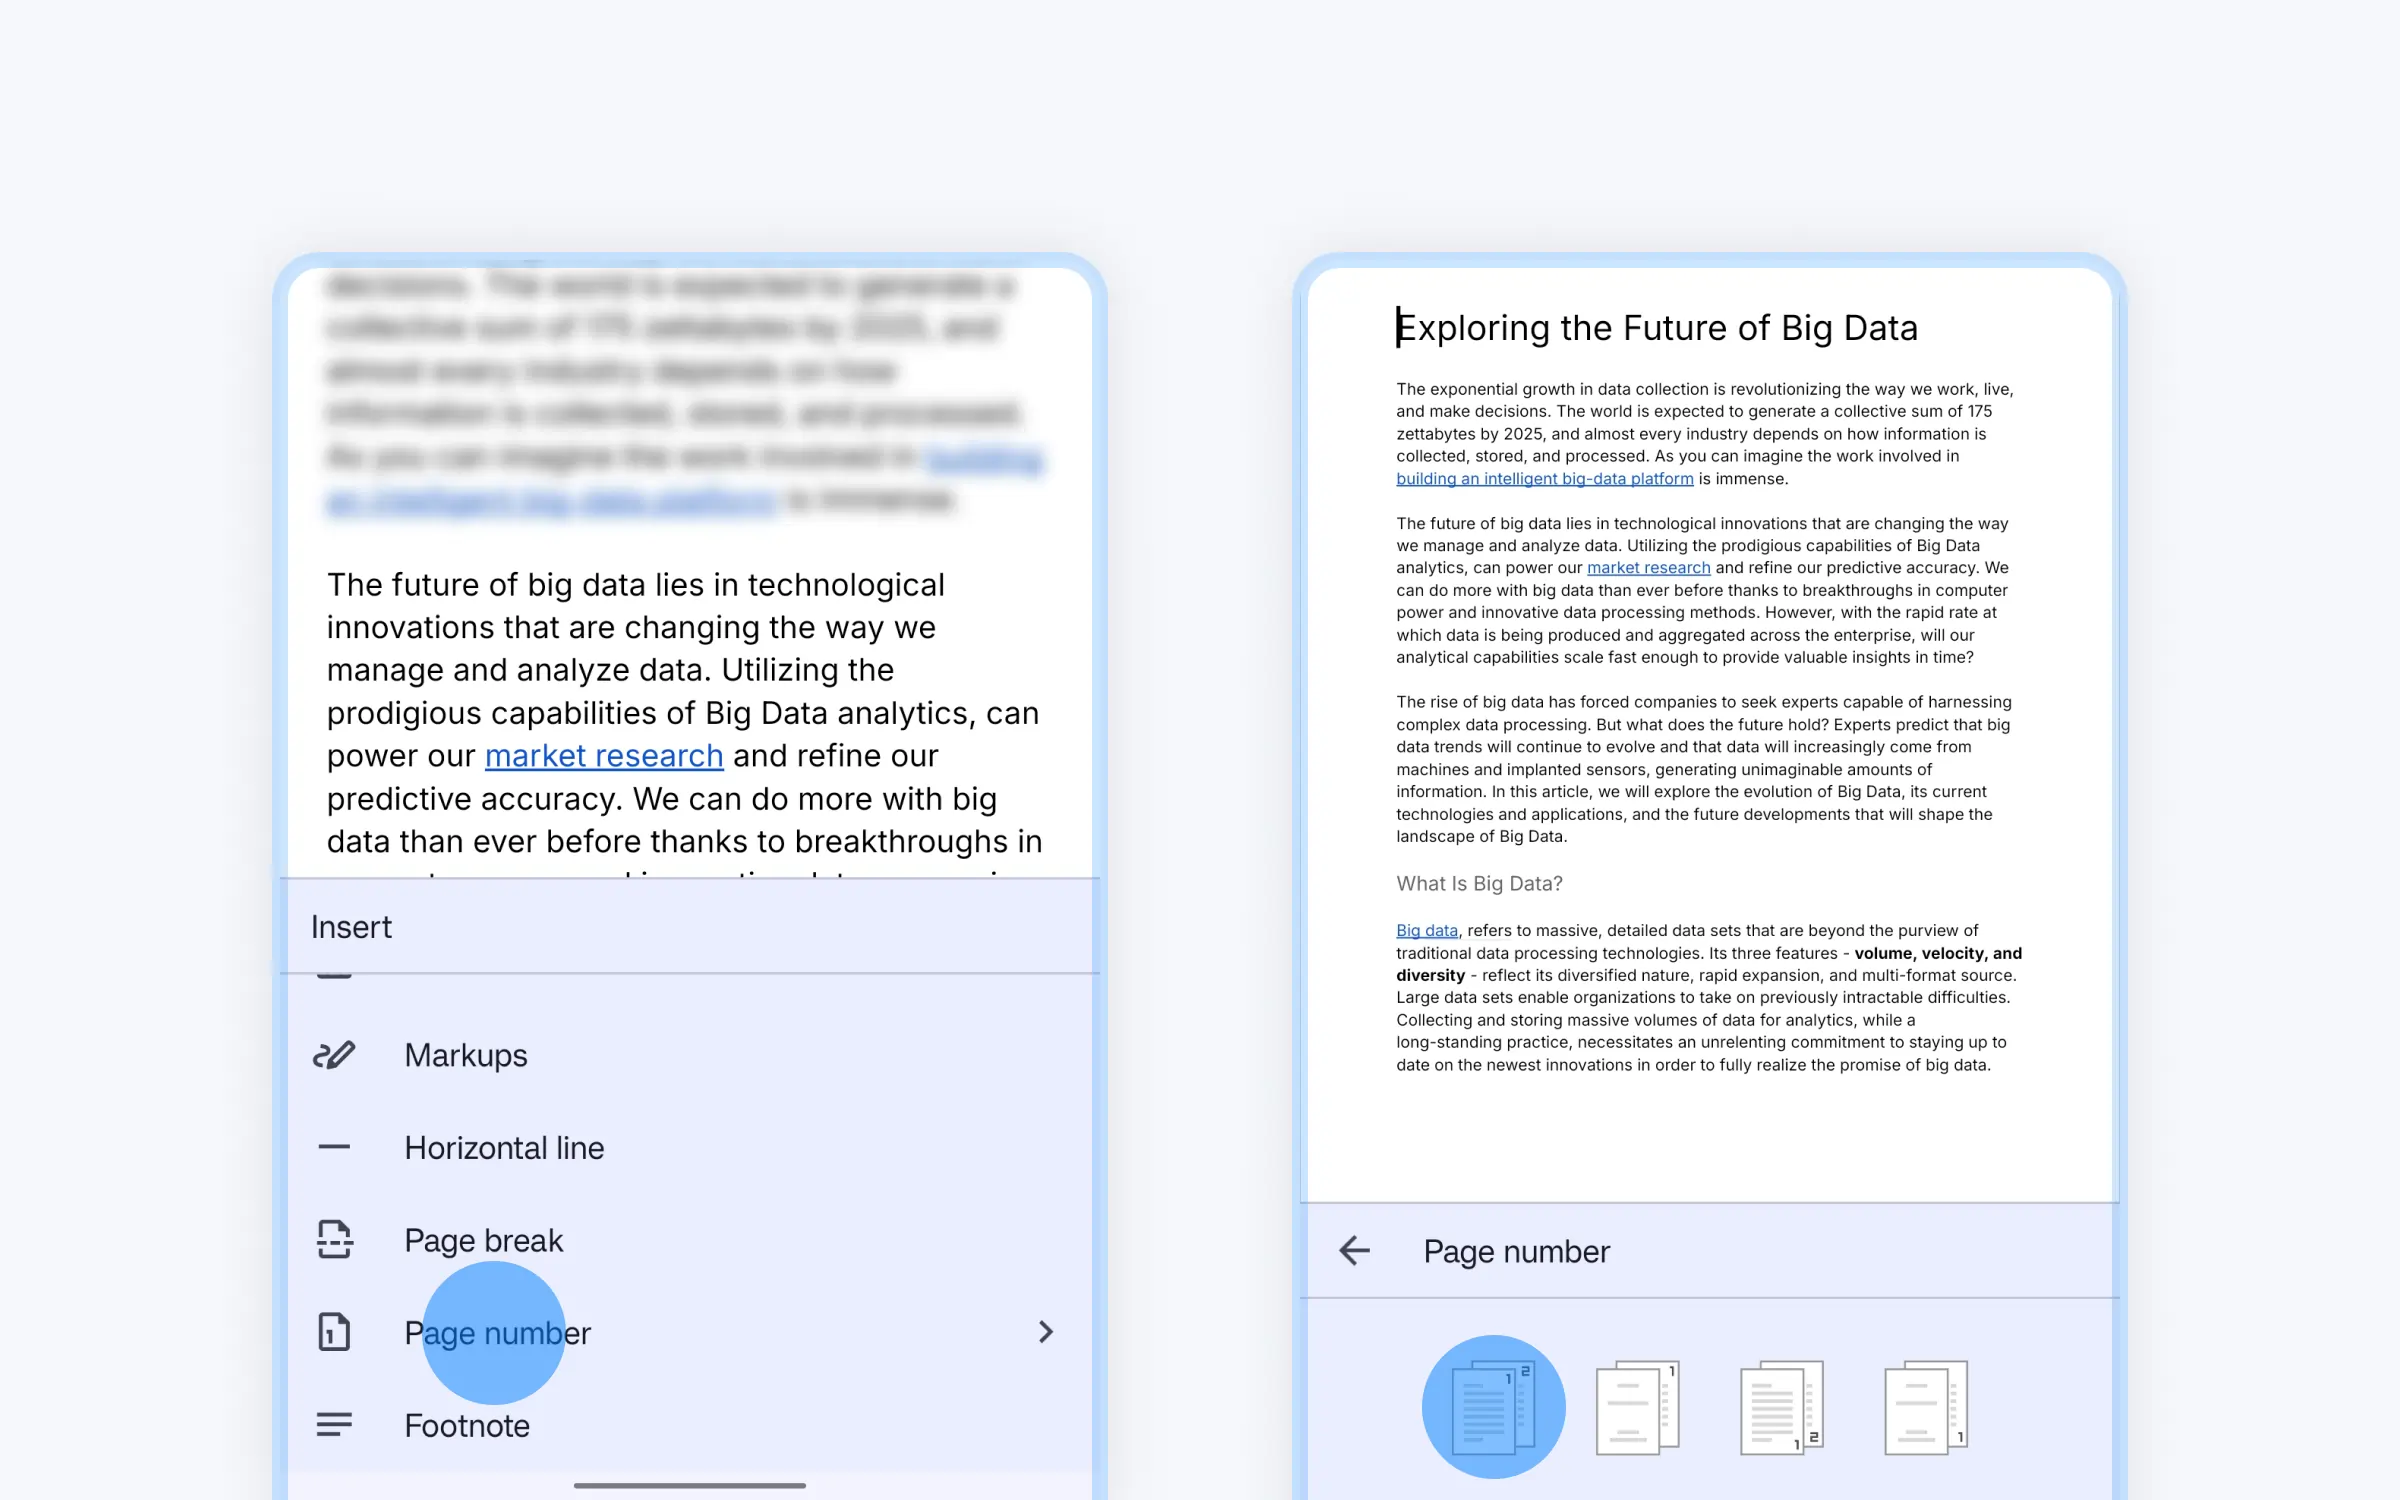
Next, go back and Tap the Plus (+) icon up top.
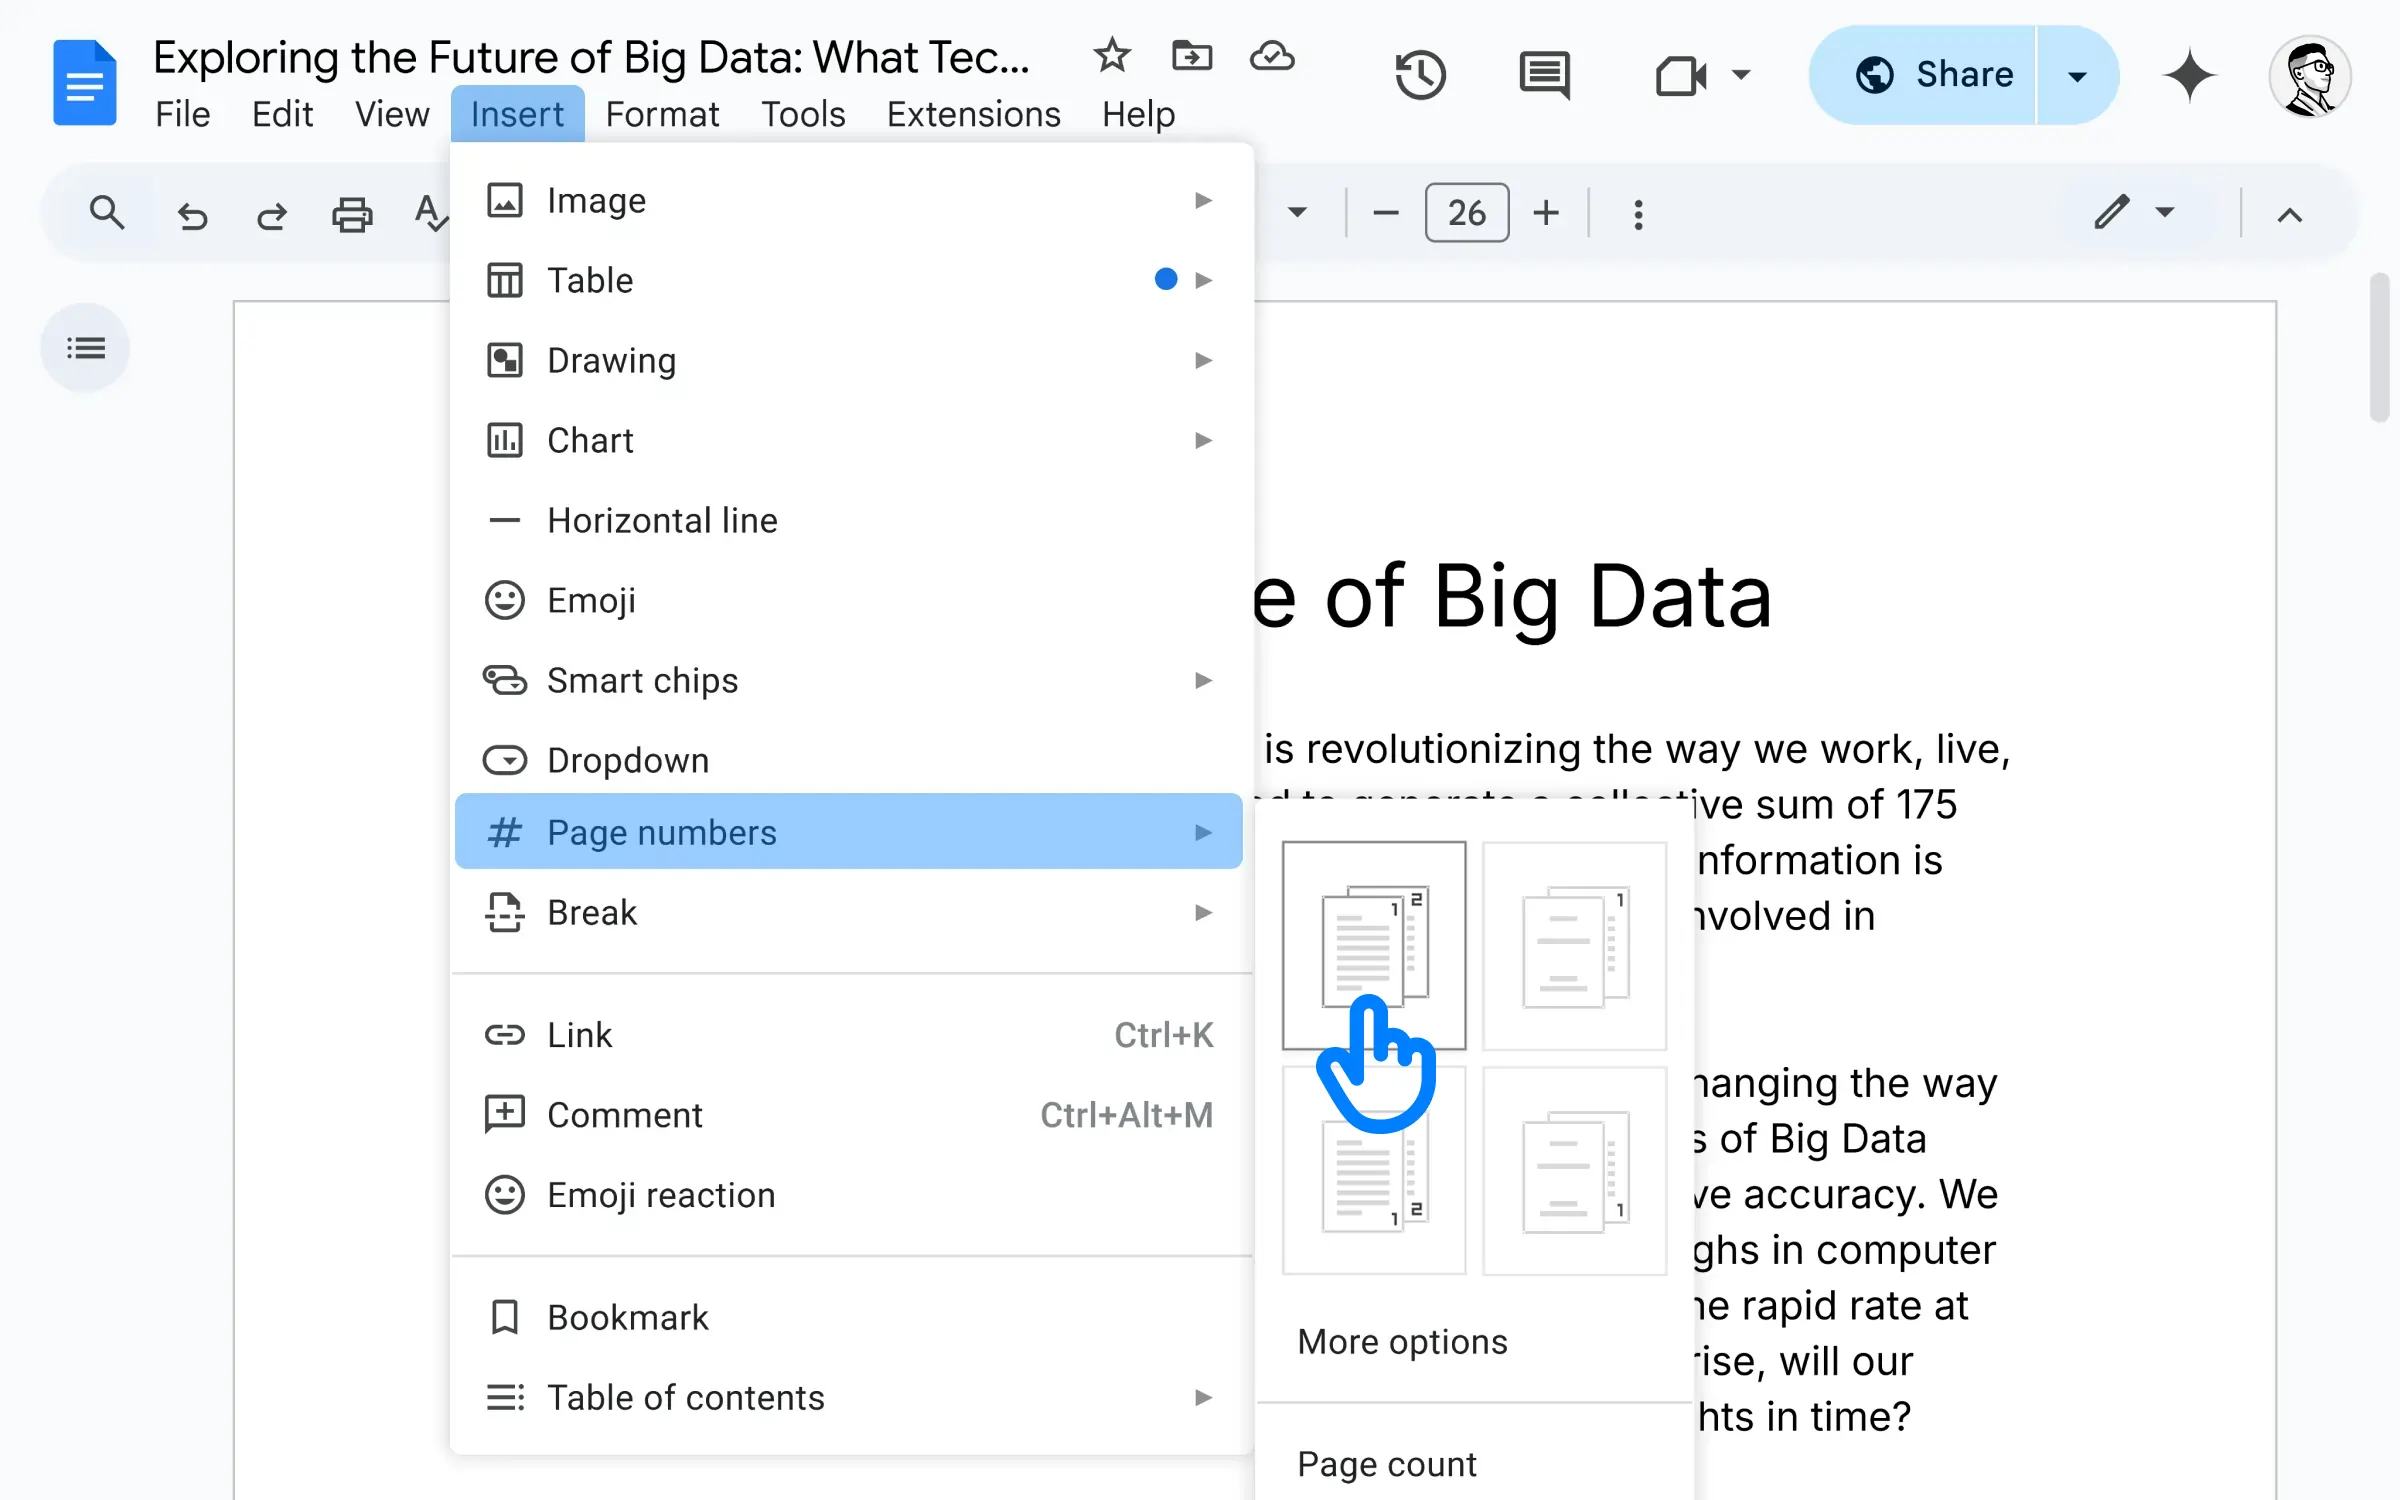
Scroll down and Tap on “Page number“.
Select one of the four options.
There you go.
@Author
Some Tips
•••
Customize Your Page Numbers
If you want to add a prefix or suffix to your page numbers, you can do so by clicking on “More options” when adding page numbers. For example, you can add “Page ” before each number.
Use Roman Numerals or Letters
I didn’t cover this in the post since there is no native way to do this. (At least not yet). You have to edit each page number and replace it with roman numbers.
Update Page Numbers Automatically
Google Docs will automatically update your page numbers if you add or remove pages from your document. (By Default)
Summary
We’ve walked through how to add page numbers to your Google Docs – from start to finish. Along the way, we looked at all the ways you can tweak those numbers to fit your document perfectly.